Before installing the LADCP on the rosette, test the cables and computer you will be using. It is important to know everything is working before you install the LADCP on the rosette.
Because the BB150 LADCP is old and sits for long periods on its side, it sometimes has a problem knowing if it is looking upward or downward. First talk to the instrument then use the following set of commands:
>PS0

>Break

>CR1

>CK

>PS0
The output of PS0 has ORIENTATION that tells in which direction the LADCP thinks is looking. If the LADCP is looking downward and ORIENTATION is down that everything is normal. Otherwise, this is a major problem and the LADCP needs to be opened to fix the problem.
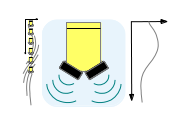
The ADCP is installed in the CTD rosette. The transducers are pointing down, and are oriented to minimize backscatter from rosette frame elements. Proper staging of the instrument. Transducers are delicate, so make sure to put a piece of stiff foam under the transducers if you set the instrument down (eg. from the LADCP box). Make sure also to put the foam back!!
BB150 held up with a chainfall
BB150 at the bottom: PVC protector
BB150 cables at the endcap
The RS422 BB150 cable layout is shown below:

Due to the electronics of the BB150, it cannot be used with a Star cable (2 instruments in an upward/downward configuration).
POWER OFF FIRST (do not plug anything together with the power supply on. Two really good reasons:
- We had a problem with big-pin-in-the-little-hole and power through the communication lines because the power was on and someone tried to put the cable together with the pins not aligned. It burnt fuses and could cause untold electrical troubles.
- There’s alot of salt water out there: there is a diode (so you can’t short the two power pins) but you can still short a power pin with a communication pin, which is Not Good.
BB150, communicating with RS422 protocol
- 8-pin cable connects instrument to long cable into the lab, and
- RS422-RS232 converter + DC power, to serial port on PC
- power for charging battery (Amrel Linear Power Supply)
- power goes into the 8-pin connector on the instrument, through
the endcap, and out the 2-pin cable to the battery. i.e. charging is done through the endcap.