All images on this page are thumbnails: click on the image to see a larger version.
Special notes on the BB150 are in a separate section.
Before installing the LADCP on the rosette, test the cables and computer you will be using. Talk to the instrument and adjust the communication and baud rates. It is important to know everything is working before you install the LADCP on the rosette.
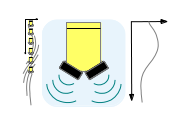
The ADCP is installed in the CTD rosette. The transducers are pointing down, and are oriented to minimize backscatter from rosette frame elements. Proper staging of the instrument. Transducers are delicate, so make sure to put a piece of stiff foam under the transducers if you set the instrument down (eg. from the LADCP box). Make sure also to put the foam back!!
mounting WH300, Scripps rosette:
Always put foam under transducers:
The battery that powers the ADCP during deployments is known as an “S.O.B.” (for Safe Orange Battery). It consists of an open orange plastic shell containing a flexible, oil-filled bladder, which in turn contains the elements of a normal lead-acid battery. The SOB is set into the rosette frame at the bottom, opposite the ADCP. It should reside in a basket or tray of some sort.
DO NOT put pressure on the top of the SOB, as that may deform the plastic or box or urethane bladder and cause leakage.
SOB in wire basket
SOB on the PMEL rosette
SOB basket made of expanded metal for Scripps rosette
The RS232 Y-cable layout for the WH300 or WH150 is shown below

The cabling diagram for two-LADCP set-up is shown in this note.
Two ends of the Y-cable in the hangar attach directly to the instrument and to an adapter (going to the battery). The remaining end should be attached to an extenstion cable, so the day-to-day plugging and unplugging occurs on an extension, not the Y cable directly.
For either LADCP used, the extension from power+communication cable should be made accessible to the outside of the rosette. These cables will be dummied off and secured during deployment, and attached to the long pigtails that go into the wet lap during download (where the computer and power supply are).

The long pigtails should be secured out of the way when the package is deployed, and should be able to be bungied up, out of the way, when download and charging are underway. We do not want the cable to get in anyone’s way.
Do your best to protect the Y-cable: use extensions on it if there will be multiple plug/unplug instances. These are hard to manufacture in a reliable manner: consider them to be rare and fragile.
Here is an example of the laptop setup on one cruise. The battery charger shown is the AMREL; the TDK-lambda could have been used. (The black cubical battery charger does not work with UH LADCP cables because we have a diode in the cable, and that confuses the charger. It can only be used to charge the SOB directly, i.e. not through a Y-cable or through the BB150 endcap).

This picture shows the Amrel linear power supply display when it is toggled off.

There are two models of LADCP that might be used:
WH150, communicating with RS232
WH300, communicating with RS232
This document contains serial cable pin conventions and a pinout diagram for a WH300 power/communication cable. It may come in handy.
We have several chargers, with different ages and purposes.
+VSET = 28.300
-VSET = 29.010
+ISET = 2.0
-ISET = 1.8
 The other 2 settings are
 INDEP
 5V
- Max voltage is 57.31 V; max current is 1.8 A.
- When charging is initiated, the battery draws the max current (1.8A). and is current limited. After some time (less than a minute when the SeaBattery was new, now about 10 minutes) the current drops and it beeps as it switches from current-limited to voltage-limited charging. It can switch back and forth a couple times between CC (constant current) and CV (constant voltage) before settling down for good. We let it charge until the current draw has dropped to 0.65 A (about 40min for a full-depth BB150 cast). If you charge much longer or allow the current draw to drop lower than this, the outgassing increases and you have to purge every cast. Toggle off the power output using the righthand on/off button (leaving the machine on but not charging). Power supply display shows “ALL OUTPUT OFF”. see picture
TDK-lambda Programmable Power Supply
Settings are similar; concept is the same
Commercial Battery charger can only be used to charge a battery directly. Our cables have a diode in them which makes the commercial charger NOT WORK with the Y-cable or the BB150 cables.


