Installing the Virtual Computer
The example below is on a Mac (OSX). On a Windows machine, the major difference should be in menu location, but the steps are the same.
Download and install the most recent version of VirtualBox (v7.0 or later)
If you are using Ubuntu you can use synaptic or apt:
sudo apt install virtualboxIf downloading from the web (for MacOS or Windows),
STOP after it says “Virtual Box installation Complete”
Do Not try to configure a “New” virtual computer. Instead you will Import a downloaded OVA file and that will become your new virtual computer.
Download(or read) the introductory text file calledcodas_focal_vbox.txt. These notes are also stored on the virtual computer Desktop but you can’t see that until the virtual computer is installed, so we provide this additional copy separately.Download the OVA file which will become the virtual computer: codas_focal_vbox64.ova. We ask you to fill out a form first so we can notify users when new versions are available.
The file is large: 6-10Gb to download, expanding to roughly 14Gb after it has been imported.
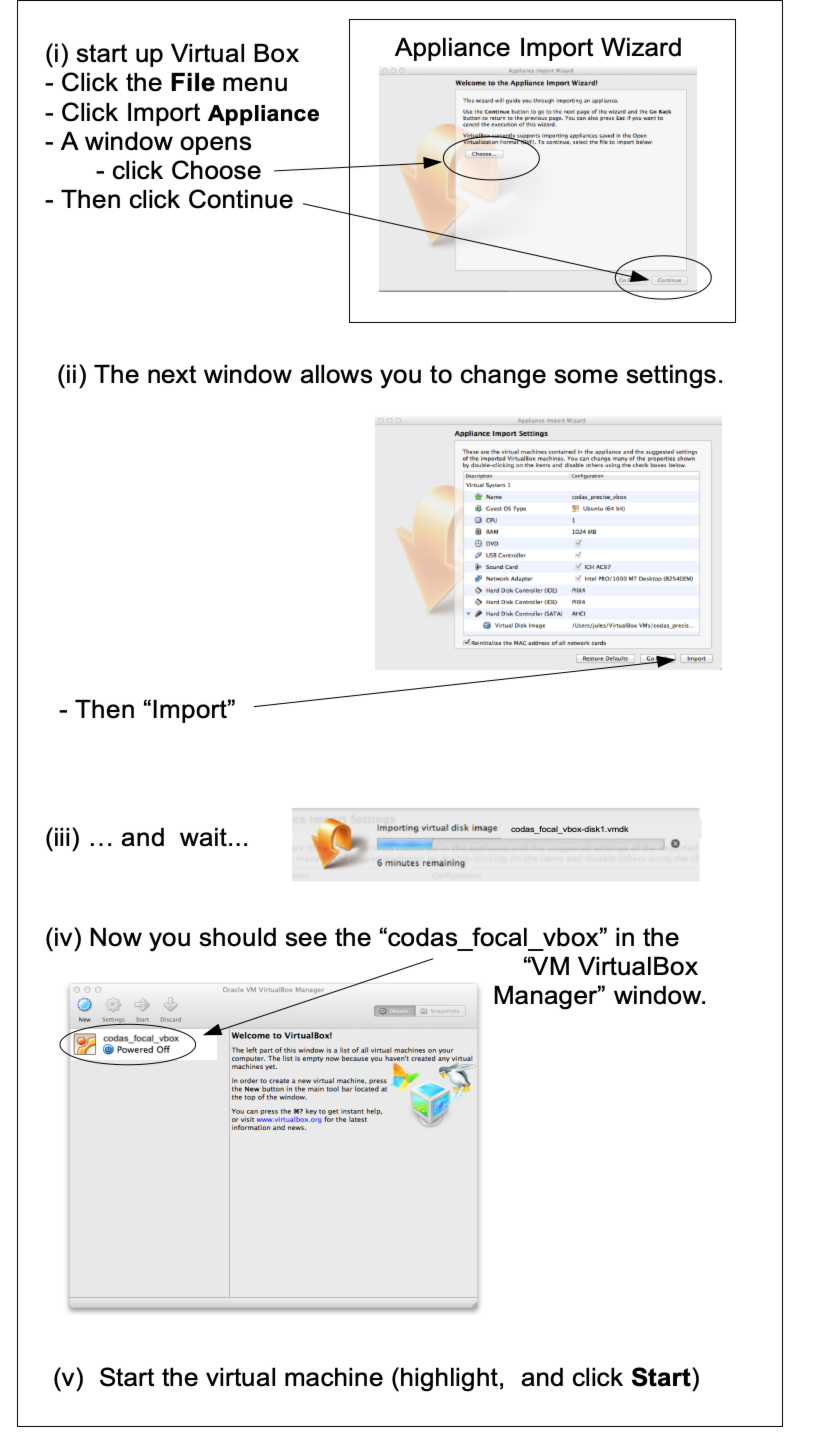
Start up the VirtualBox program and “Import” the OVA for the CODAS virtual computer that you just downloaded. See details below.
(Click on the images below to enlarge)
Goal

Details
(Return to TOP)