1.1. Option #1 – Virtual Computer
The instructions in this section are aimed at getting the CODAS virtual computer running on your computer. All external packages and CODAS software are already installed, as is the topographic database we use. Once the virtual machine is installed, it is ready for use.
This page has the following sections:
1.1.1. VBox Introduction
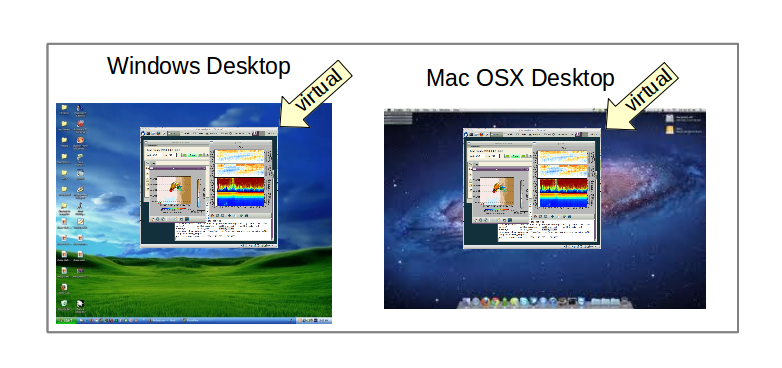
A “virtual computer” is a computer (a “guest”) emulated in software, running on a physical computer (a “host”). Its display can be run in a window on the host, or it can take over the full screen. The emulation is accomplished by “virtualization software”, the two main options for our purpose being Virtual Box and VmWare.
This example is written for Virtual Box, which is freely available for Windows, OSX, and Linux computers.
Running a “virtual computer” will only work on a computer with reasonably generous resources: the virtual computer will need the following from the host:
at least 4Gb memory
at least 16Gb video RAM
20Gb of hard drive space.
(Return to TOP)
1.1.2. Installing the Virtual Computer
The example below is on a Mac (OSX). On a Windows machine, the major difference should be in menu location, but the steps are the same.
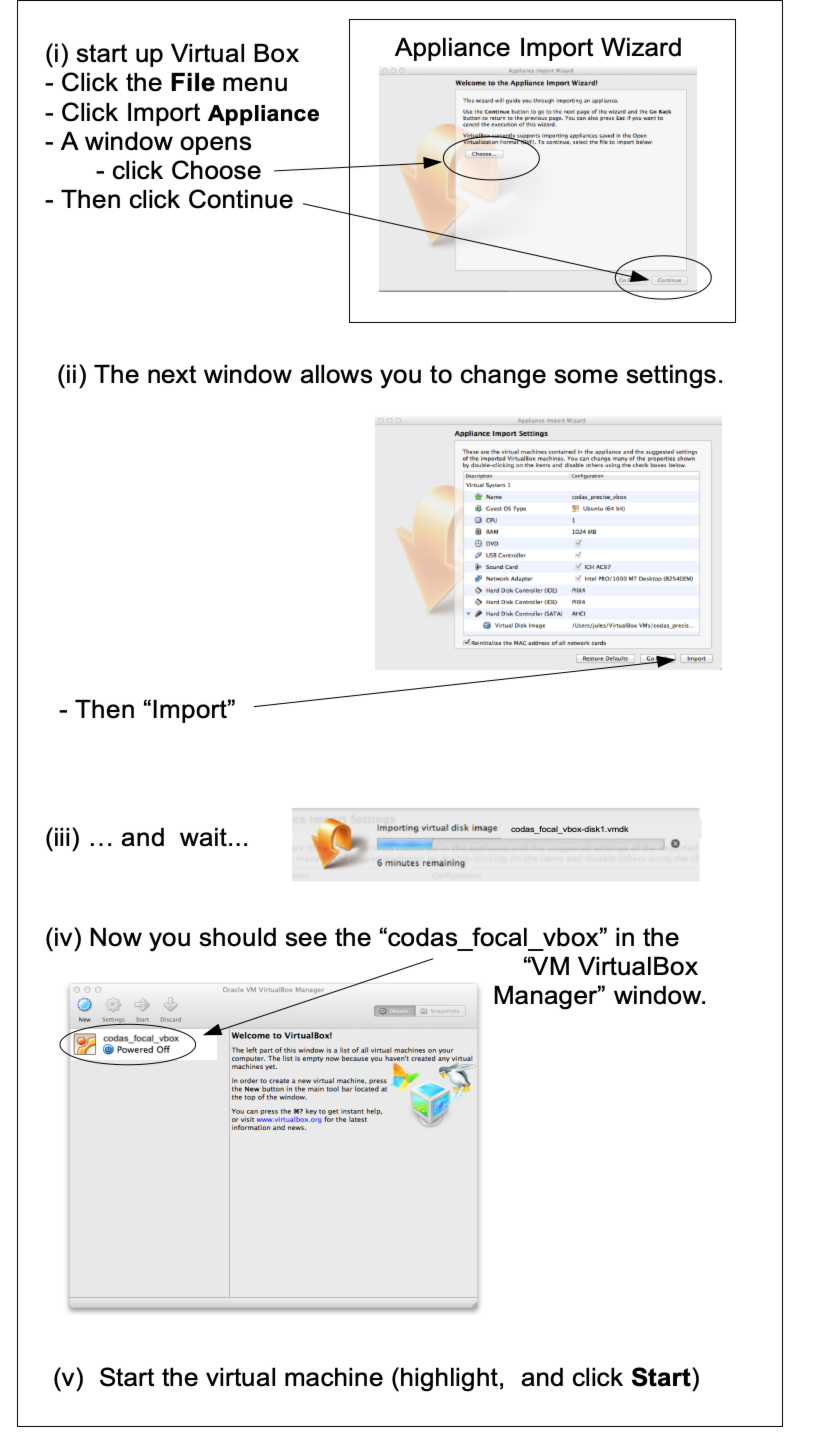
Download and install the most recent version of VirtualBox (v7.0 or later)
If you are using Ubuntu you can use synaptic or apt:
sudo apt install virtualboxIf downloading from the web (for MacOS or Windows),
STOP after it says “Virtual Box installation Complete”
Do Not try to configure a “New” virtual computer. Instead you will Import a downloaded OVA file and that will become your new virtual computer.
Download(or read) the introductory text file calledcodas_focal_vbox.txt. These notes are also stored on the virtual computer Desktop but you can’t see that until the virtual computer is installed, so we provide this additional copy separately.Download the OVA file which will become the virtual computer: codas_focal_vbox64.ova. We ask you to fill out a form first so we can notify users when new versions are available.
The file is large: 6-10Gb to download, expanding to roughly 14Gb after it has been imported.
Start up the VirtualBox program and “Import” the OVA for the CODAS virtual computer that you just downloaded. See details below.
(Click on the images below to enlarge)
Goal

Details
(Return to TOP)
1.1.3. CODAS Virtual Computer Navigation
Note
If you are having problems getting the Virtual Computer to import, or have other strange warnings, jump to the section below with some hints.
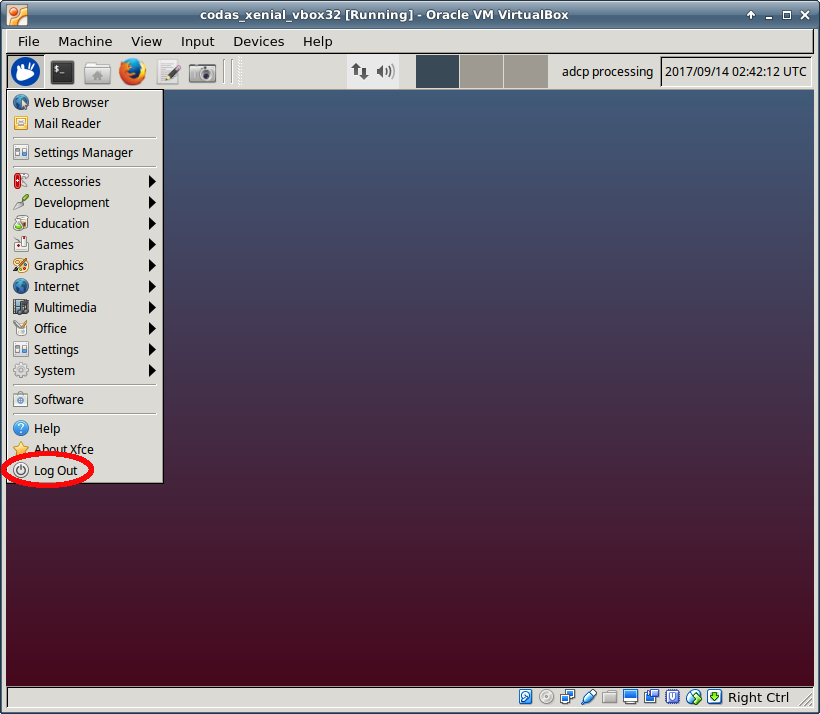
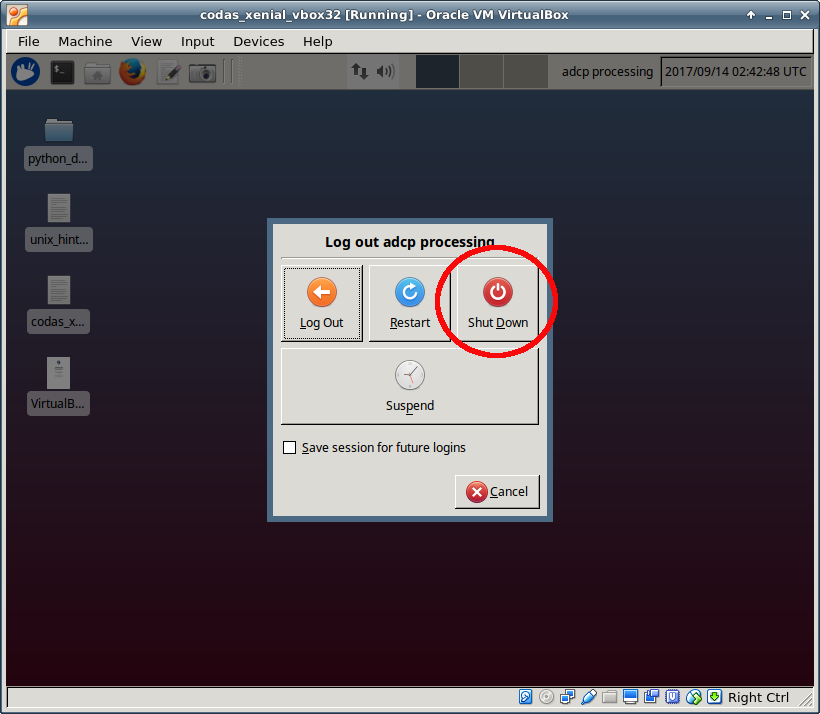
When booted, the virtual computer automatically logs in
user “adcpproc”
password “codas3”
computer is called “codaspy”
Networking is done by Virtual Box through the host computer, so if your computer is on the network, codaspy should also be on the network (should be able to see Google). By default the virtual computer networking is “NAT”, so other computers on your network cannot see it. If you change this, be sure to change the password too, because that password is public knowledge. You can change the password by typing this command in a bash terminal window:
passwd
It will ask for the current password (codas3), and enter the new one twice.
Don’t forget what you enter!
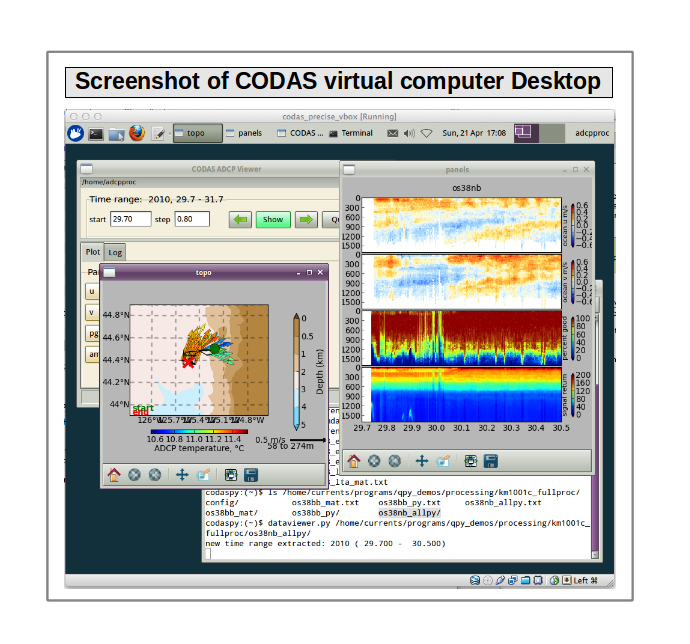
The images below give a quick look at the tools on the codaspy desktop. Click the images for a larger view.
General desktop layout
Your desktop color may different from these screenshots, but the layout should be the same. The new desktop is only shown where there are substantive differences.
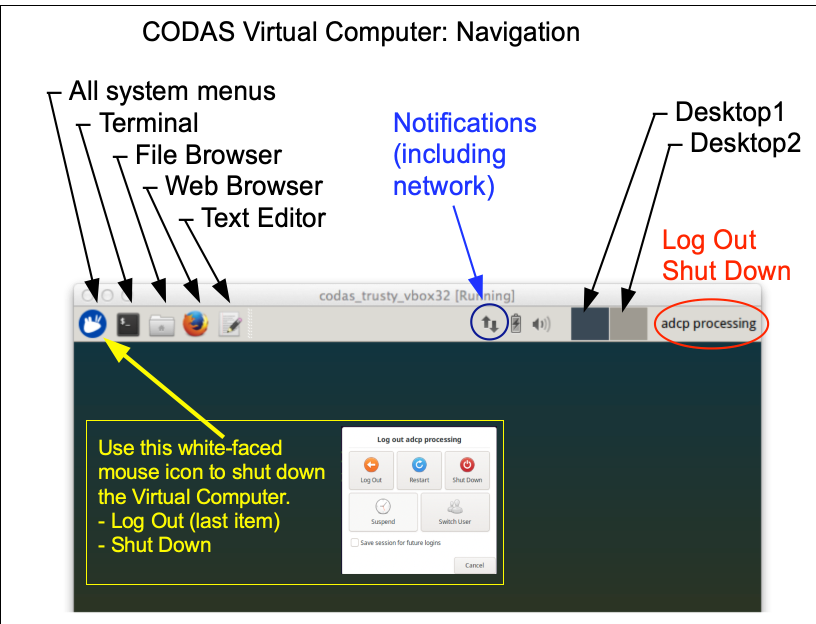
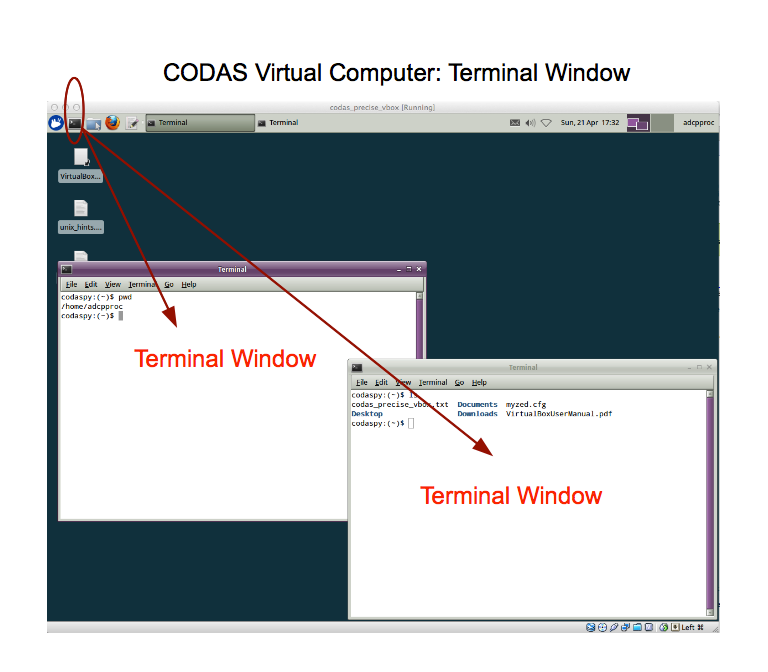
Starting a Terminal window
The Virtual computer has been set to share a clipboard with the host computer, so you should be able to copy and paste instructions back and forth.
It is HIGHLY BENEFICIAL to have a 3-button mouse for editing and copy/paste commands in the Linux environment.
Copy/paste within the virtual computer can be done with a 3-button mouse by
double click or click-and-select text with the left button
paste it by clicking the middle button once.
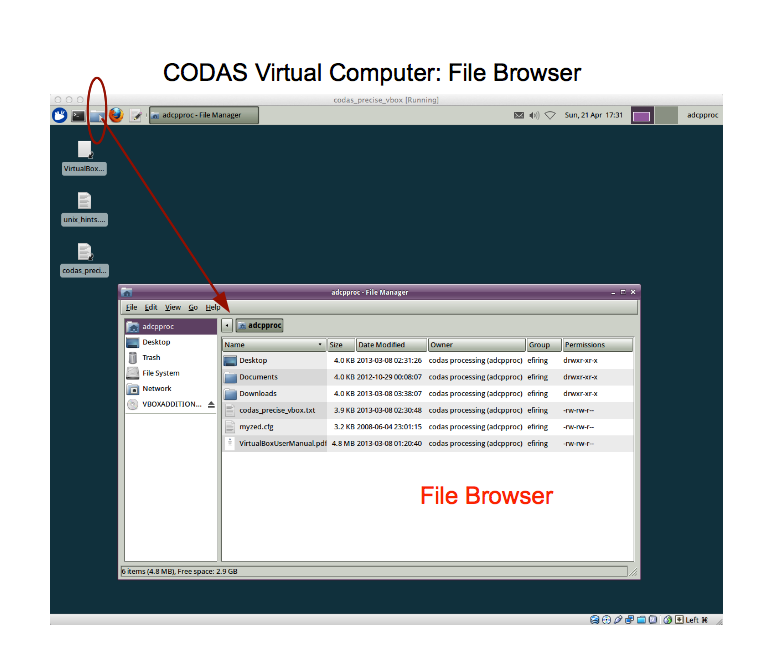
Starting a File Browser
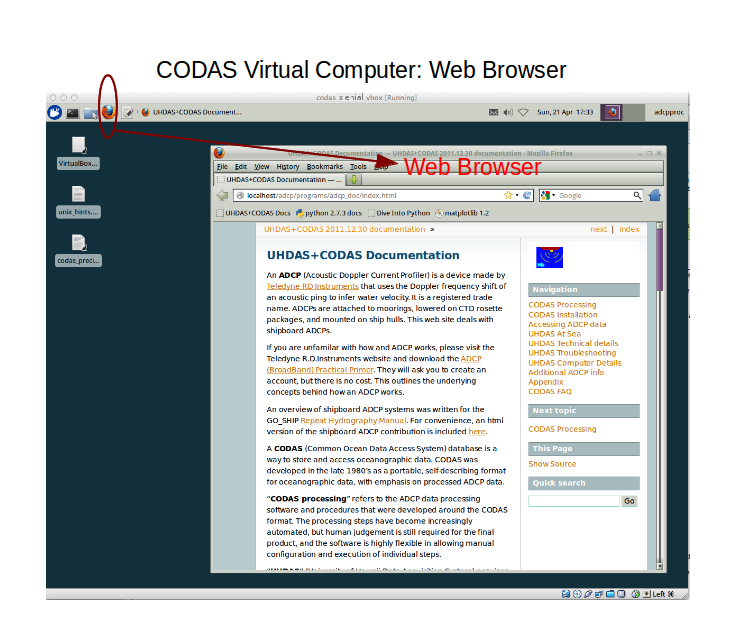
Starting a Web Browser
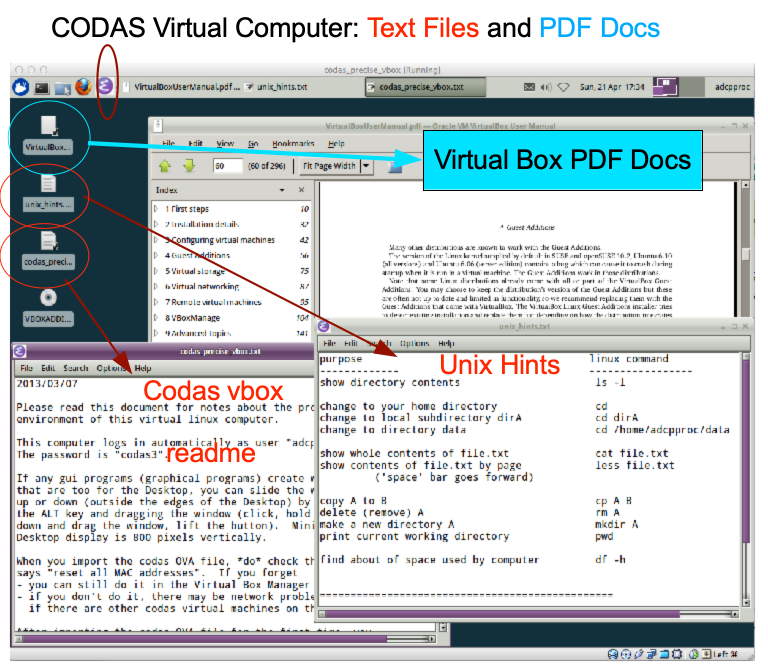
Starting a Text Editor: example using 2 text files provided
(Return to TOP)
1.1.4. Configuring the Virtual Computer
Note
If you are having problems getting the Virtual Computer to import, or have other strange warnings, jump to the next section to see some hints.
1.1.4.1. Install “Guest Additions”
It seems as if newer Virtual Box versions do not require that the Guest Additions be re-installed after importing. You can test this by resizing the window with the CODAS virtual computer in it. If the “desktop” of the virtual computer resizes as well, then Guest Additions are already installed. If the window resizes but the desktop inside it doesn’t change or doesn’t scale properly, the you’ll have to Google how to install the Guest Additions.
So it seems you can skip this step. Please let us know if that is not the case.
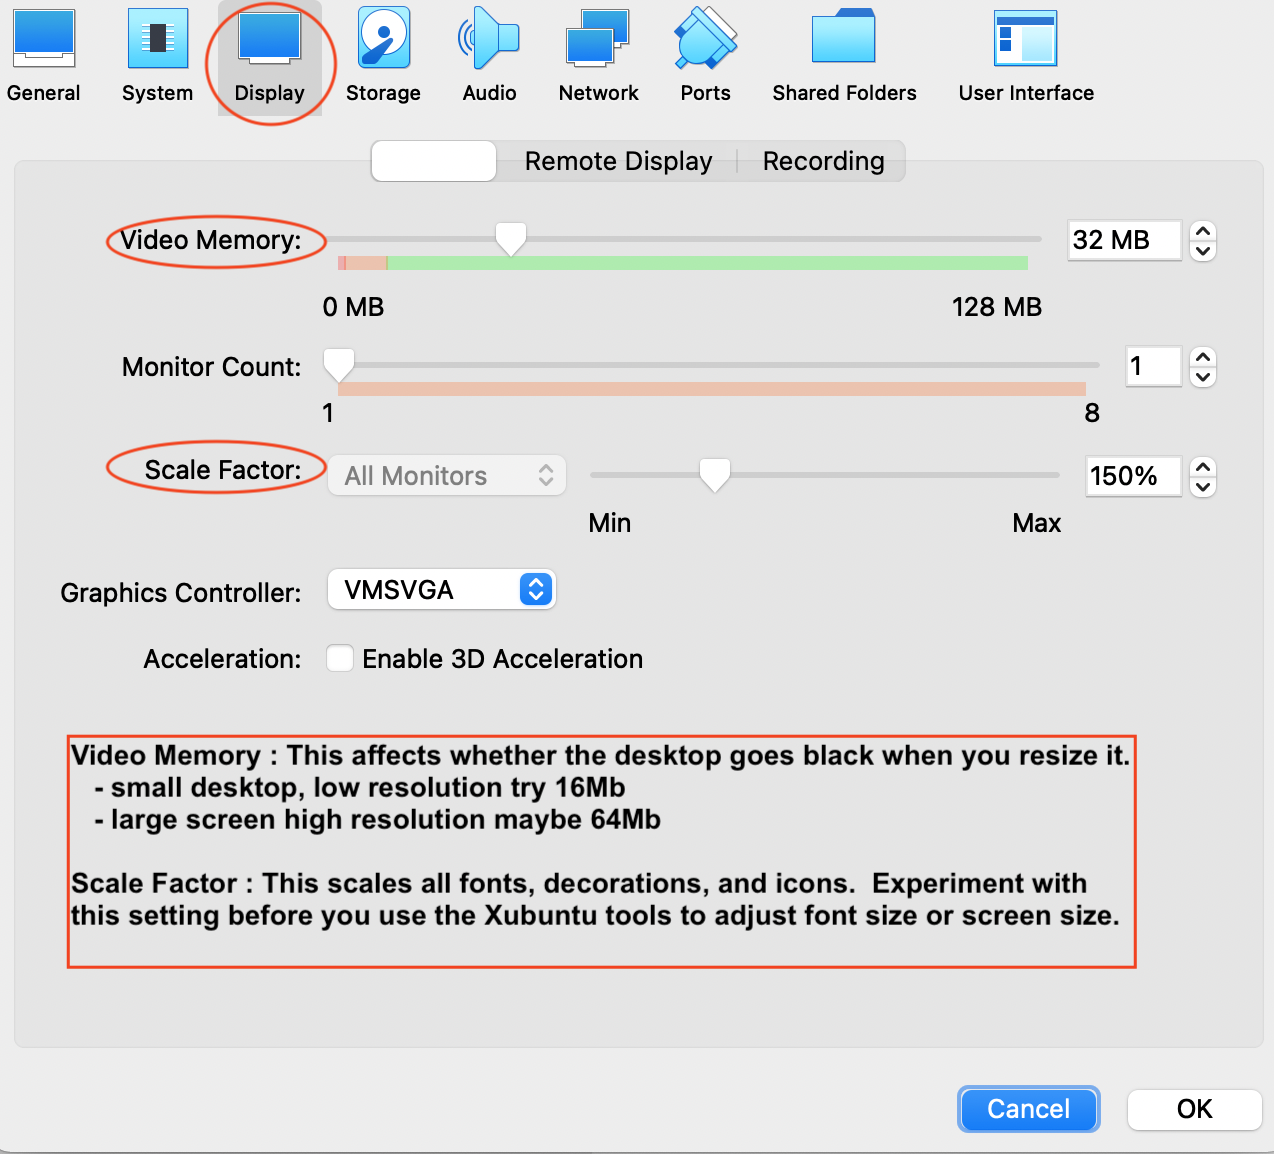
1.1.4.2. Adjust the video memory and Scale
You can adjust the “Scale” to change how big the fonts, decorations, and icons are on your display. In addition video memory may need to be increased to have a snappier response (and to keep it from going black if you increase the size). These are controlled in the Virtual Box Settings, in the Display tab.
1.1.4.3. Set up shared directory
Configure the virtual computer so it can use a directory that is on your own computer, the “host” computer. This is not the same technical meaning as “sharing a directory” under OSX. The term “sharing”, even as a technical term, is in wide use.
To do this, you must tell the virtual computer what directory to share. You must do this when the virtual computer is OFF.
It is adviseable to create a new folder in your home directory and do all your shared work in that folder. If you are unfamiliar with Linux, you risk far less that way, than by sharing your entire home directory.
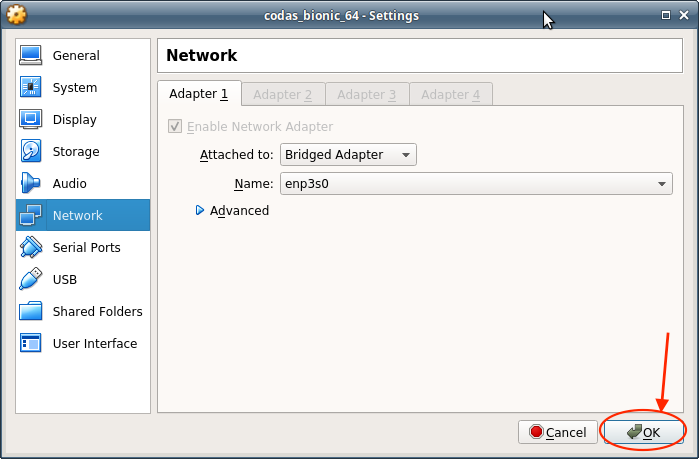
Tell Virtual box what folder to share
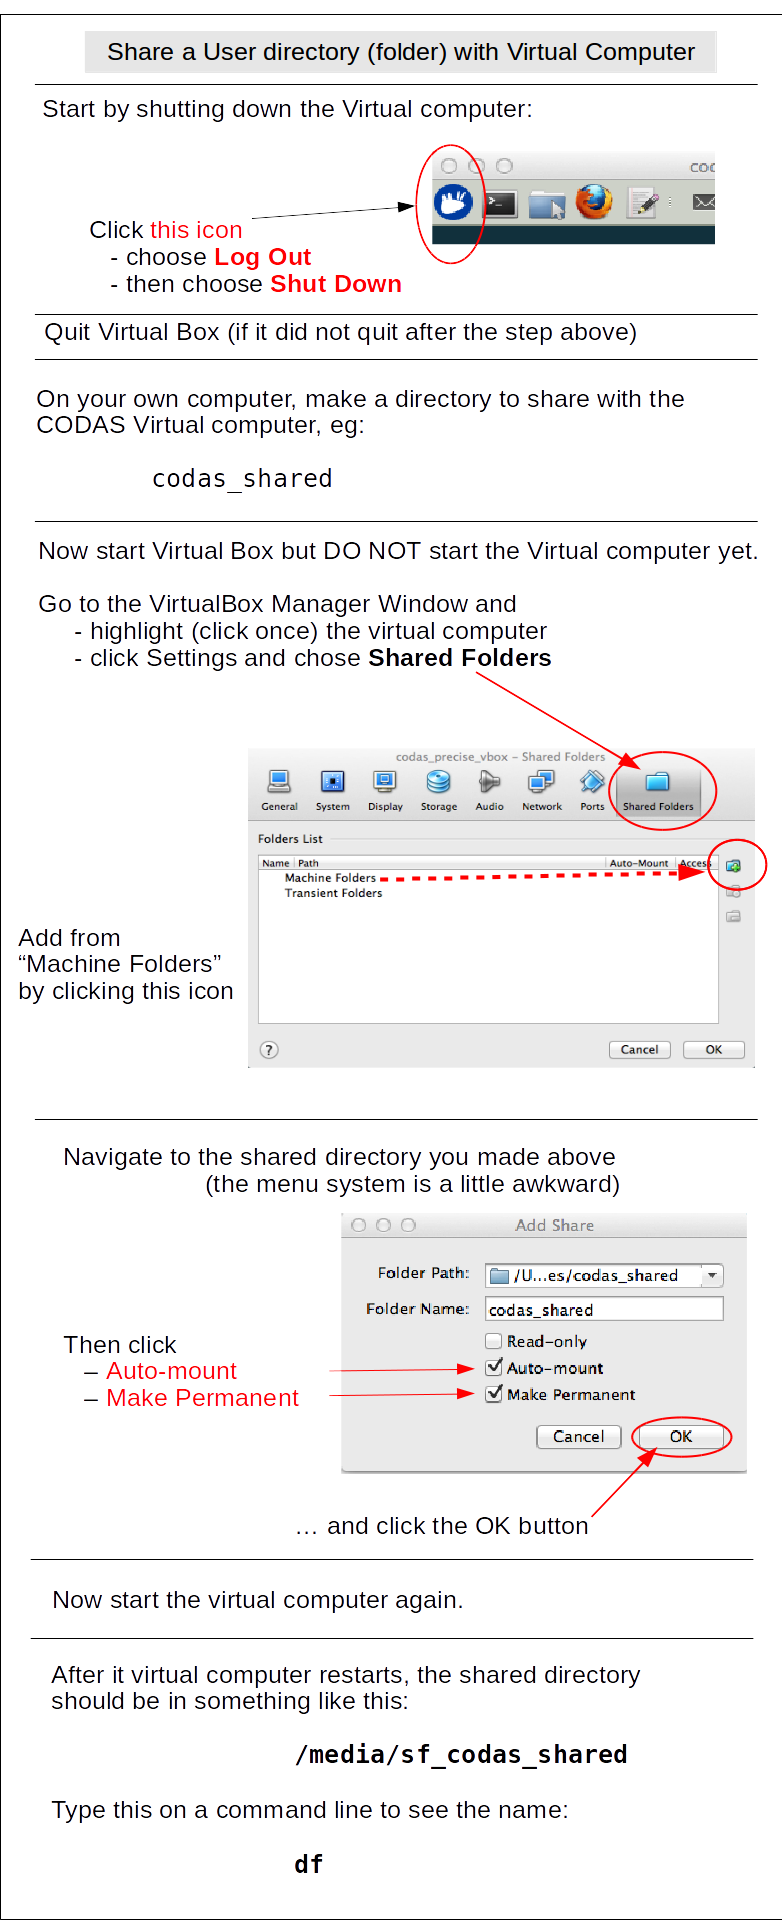
Note
Everything below here is changed within the virtual computer.
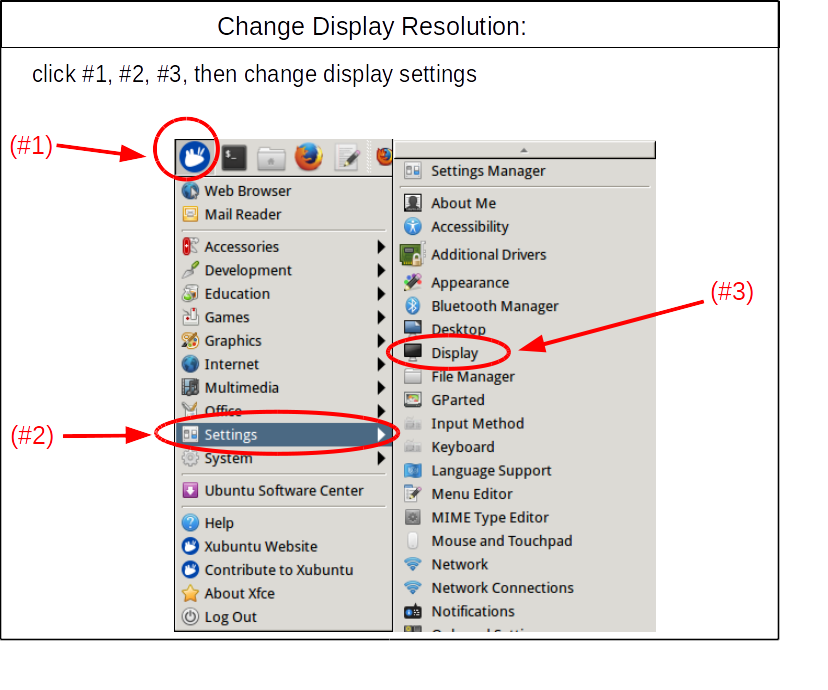
1.1.4.4. Change screen resolution
Depending on your computer’s screen resolution and size you may want to change the virtual computer display settings.
Note
Don’t forget, you can adjust the entire scale of the fonts and other decorations by going to the Virtual Box “Settings” menu, and under Display, adjust the scale. Do that before adjusting the screen resolution.
1.1.4.5. Change Terminal font size
You may also want to change the font size for the Terminal. This is Gnome Terminal - choose Edit:Preferences and alter the settings for the profile of interest.
Note
Once you get everything working, then in general you should NOT upgrade anything (linux, CODAS programs, or Virtual Box) unless there is a good reason.
DO NOT upgrade Virtual Box if everything is working, although it will probably ask you every time you boot the virtual machine.
DO NOT upgrade the linux system to a newer version of the operating system. Many things are likely to break.
In general, DO NOT upgrade the CODAS processing code. There could be significant reorganization or changes which would be painful to adapt to. Instead, if there is some reason to upgrade the CODAS processing code, (for example if you found a bug) then you could try, but you might need to replace your virtual computer with another one. The virtual computer is designed to be used and then after some point, replaced rather than manually updated.
At this point, you should be able to test your CODAS virtual computer using these instructions.
If you want to see all the effort you saved during installation, or learn more about the components that go into installing CODAS software, browse to the next page.
Otherwise, assuming everything works, you can skip the other installation pages and move on to processing.
(Return to TOP)
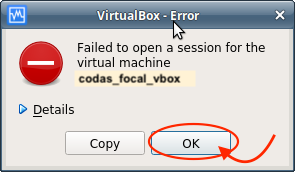
1.1.5. Warnings and Errors when Starting Up
1.1.5.1. BIOS Virtualization Warning
When you start the computer, you may get a warning like this:
or expanded:
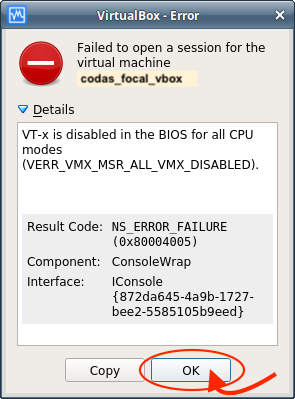
This means your BIOS has virtualization disabled. You must enter the BIOS and enable Virtualization Technology
Here is an example of the steps required:
shut down the computer
boot the computer and press F10 or DEL to enter the BIOS
- go to
Security-> System Security
Look for something saying “Virtualization Technology”; ENABLE IT
Save and restart the machine.
1.1.5.2. Ethernet Port Warning
When you start the Virtual Computer you may get a pop-up window with a warning that the network adapter “eno1 Wi-Fi (AirPort) (adapter 1)” was not found.
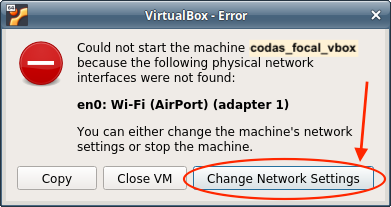
Click on the box that says “Change Network Settings”
Now you will get a Virtual Box tool to change the settings, already on the Network tab. Just click OK, because it has probably autodetected your network card.
1.1.5.3. Black Screen After Boot
After starting the Virtual Computer, it may display Xubuntu and a spinning circle, then be stuck on a black screen. One option that helps some people is increasing their video memory. You must shut down the Virtual Computer before making this change.
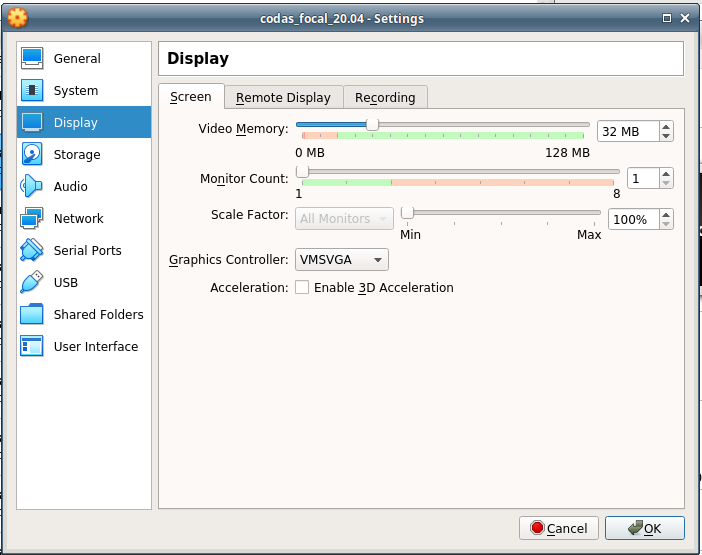
Inceasing the video memory from to 32 MB or 64 MB should provide the resources needed for the Virtual Computer to finish booting and reach the desktop.
1.1.5.4. Virtual Computer Too Slow
The Virtual Computer may take a long time to boot, not reaching the Xubuntu loading screen with a spinning circle. It may also load the desktop, but be too slow to effectively work. One possible fix is to increase the system memory from 1024 MB to 2048 MB or 4096 MB, which should provide enough resources for the Virtual Computer to be usable.
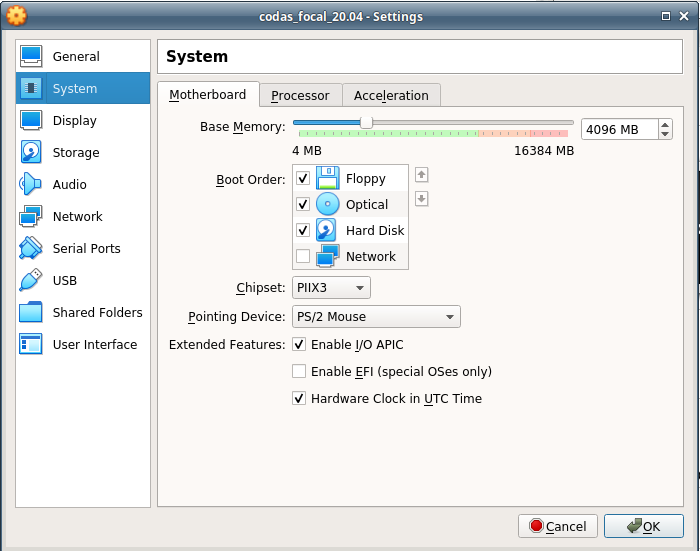
While more memory will make the Virtual Computer faster, it comes at the expense of the host computer and there is a diminishing return on resources allocated after being usable at 4096 MB.
Now the virtual computer should boot.
(Return to TOP)
1.1.6. Resetting MAC address:
You may not need to do this.
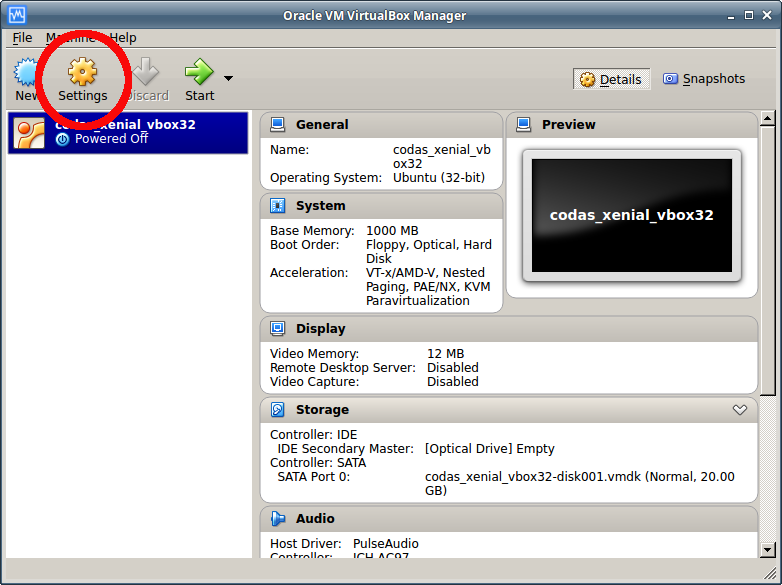
- (i) First,shut down your VM if it is on:
- (ii) Now in your “Oracle VM VirtualBox Manager” click “Settings”:
- (iii) Then click on “Network” on the left of the screen:
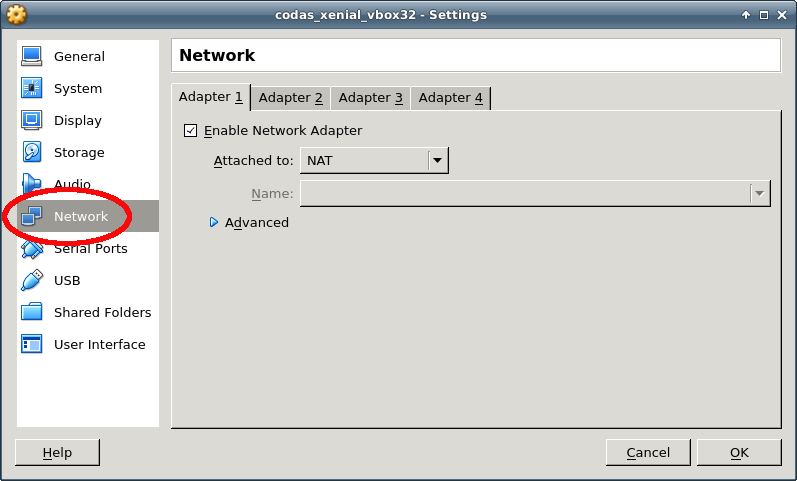
- (iv) Now click on “Advanced” blue arrow:
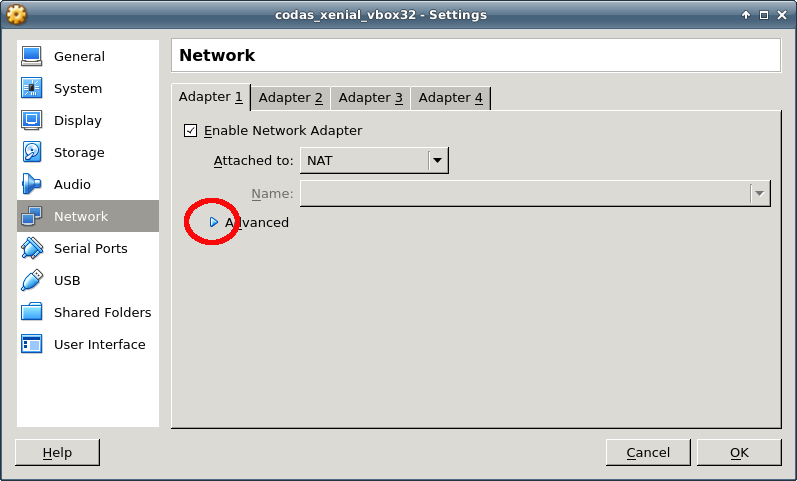
- (v) And finally click on the blue round arrows:
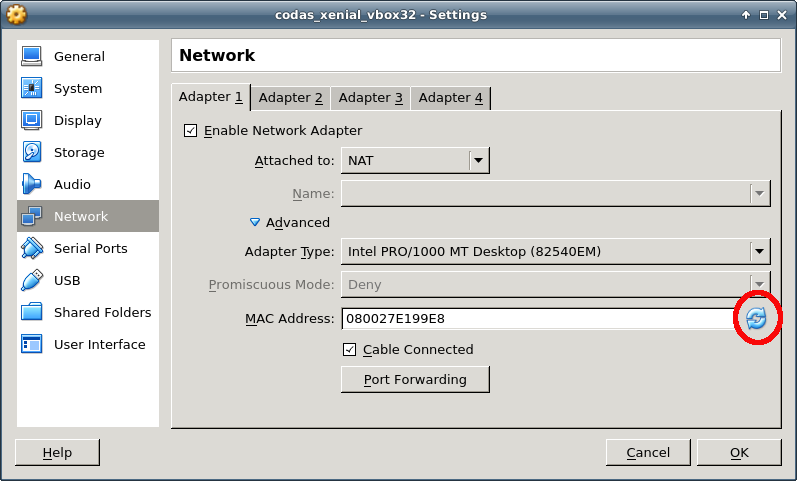
(Return to TOP)
Now you can restart your Virtual Computer and the MAC address will be unique.
Note
You do not need to do anything else in the installation process. You can proceed straight to the CODAS ADCP Processing section from here.