2.3.5. VBox Part 3: Configuring the Virtual Computer
2.3.5.1. (i) Update the CODAS Python programs.
The CODAS Python programs undergo various improvements, and we try to update the Virtual Computer and the documentation so they reflect any major changes that have occurred. But there may be minor changes, so after you import the Virtual Computer, it is best to update the CODAS programs once so you have the most recent code. Then if you do have a problem, we can work to fix it.
Type the following code in a terminal window to update the CODAS Python to the most recent stable version. You are running this as user “adcpproc”. It will ask you for the password, which is codas3
cd /home/adcpcode/programs
source update_all.bash
2.3.5.2. (ii) Install “Guest Additions”
It seems as if newer Virtual Box versions do not require that the Guest Additions be re-installed after importing. You can test this by resizing the window with the CODAS virtual computer in it. If the “desktop” of the virtual computer resizes as well, then Guest Additions are already installed. If the window resizes but the desktop inside it doesn’t change or doesn’t scale properly, the you’ll have to Google how to install the Guest Additions.
So it seems you can skip this step. Please let us know if that is not the case.
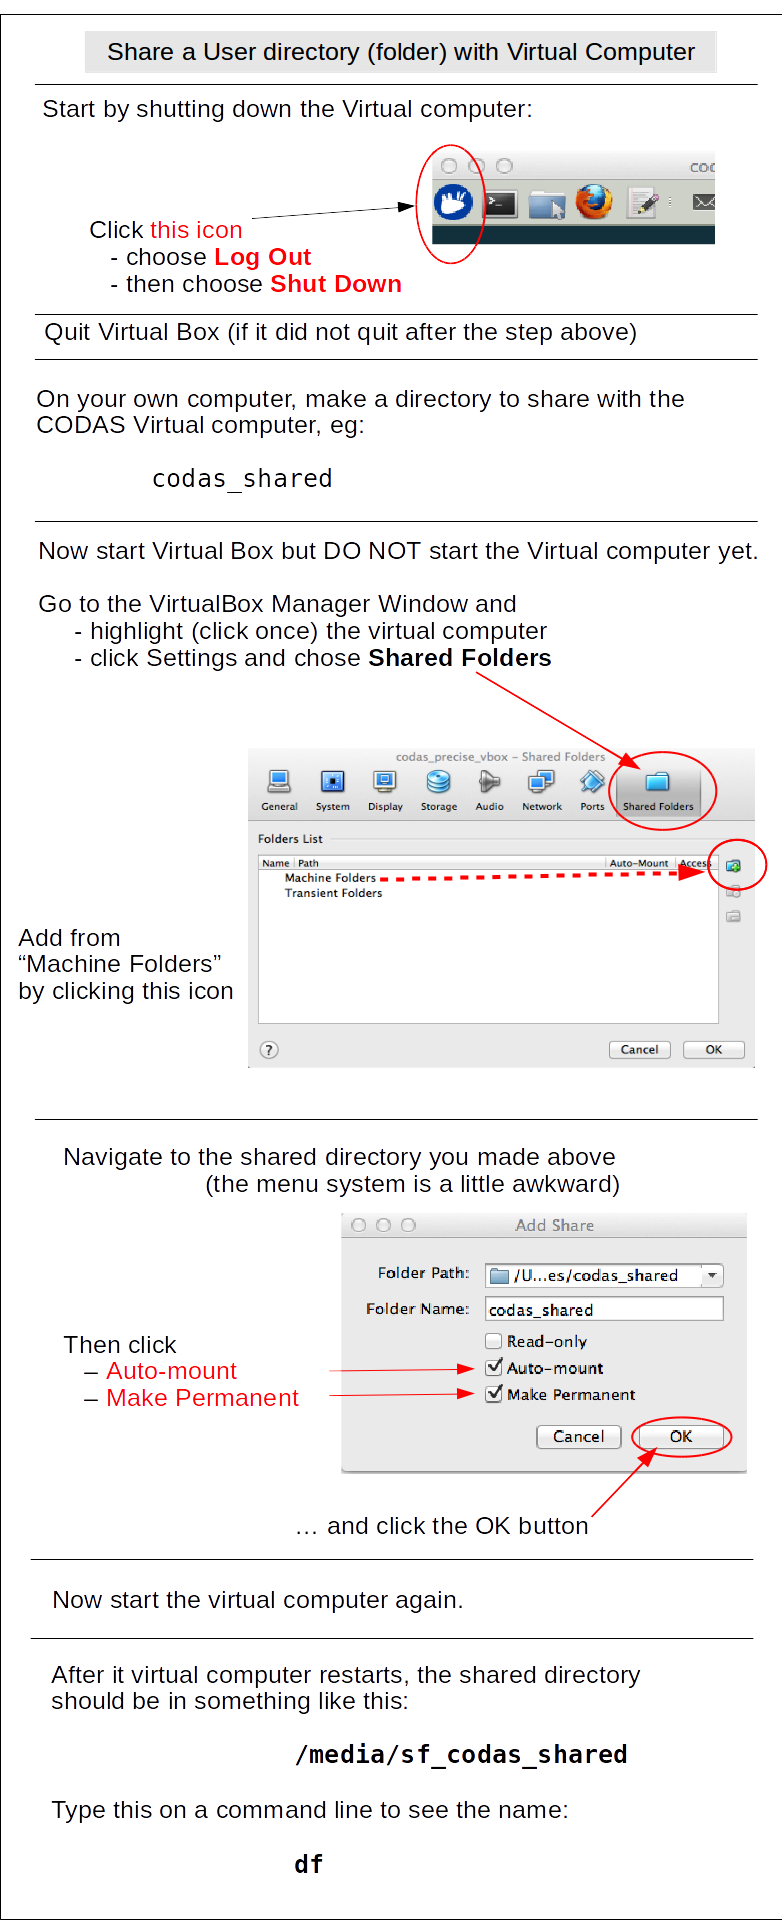
2.3.5.3. (iii) Set up shared directory
Configure the virtual computer so it can use a directory that is on your own computer, the “host” computer. This is not the same technical meaning as “sharing a directory” under OSX. The term “sharing”, even as a technical term, is in wide use.
To do this, you must tell the virtual computer what directory to share. You must do this when the virtual computer is OFF.
It is adviseable to create a new folder in your home directory and do all your shared work in that folder. If you are unfamiliar with Linux, you risk far less that way, than by sharing your entire home directory.
Tell Virtual box what folder to share
2.3.5.4. (iv) Change screen resolution
Depending on your computer’s screen resolution and size you may want to change the virtual computer display settings.

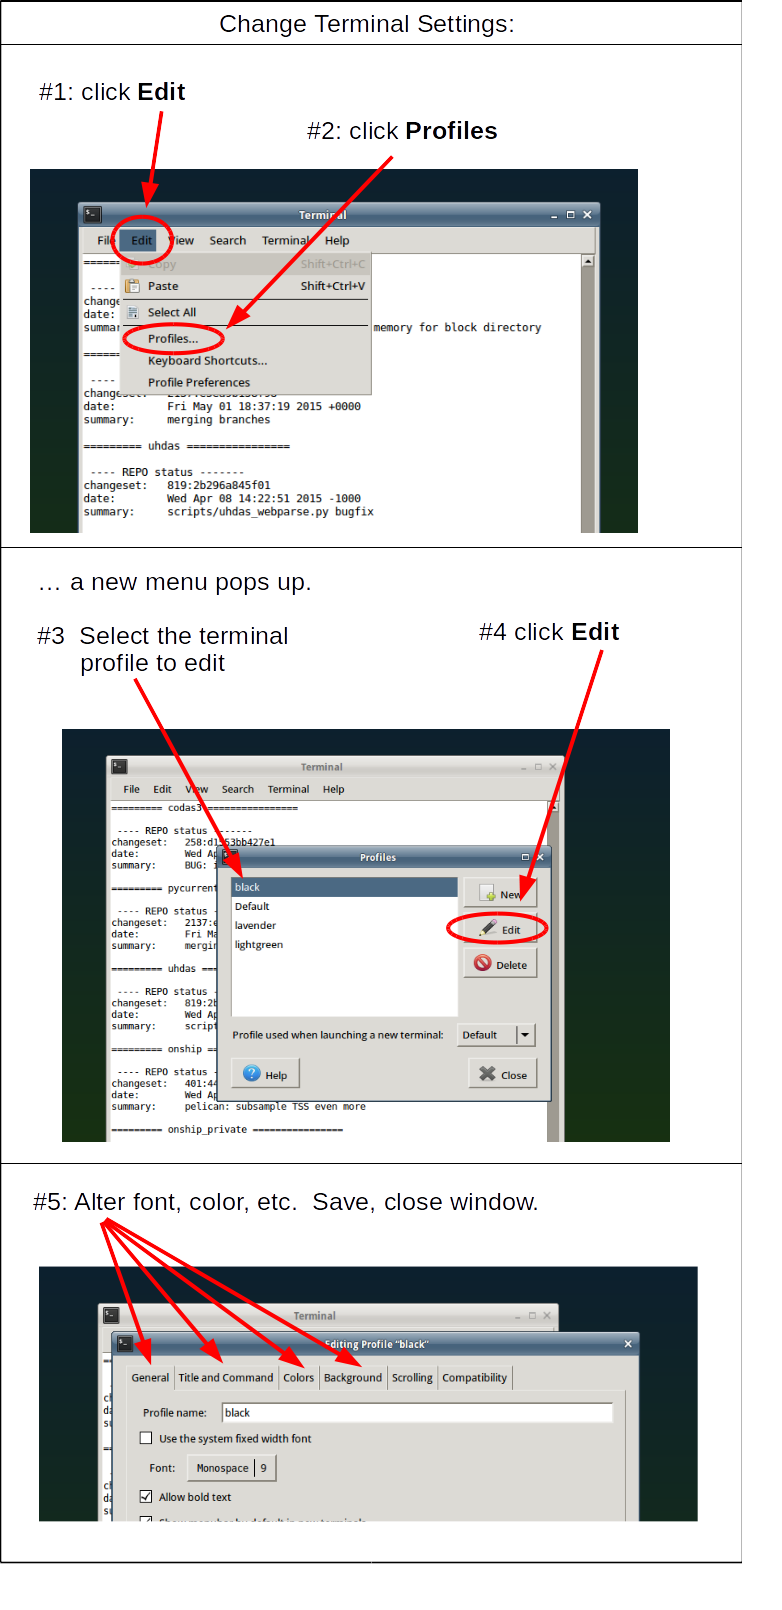
2.3.5.5. (iv) Change Terminal font size
You may also want to change the font size for the Terminal.
Note
Once you get everything working, then in general you should NOT upgrade anything (linux, CODAS programs, or Virtual Box) unless there is a good reason.
DO NOT upgrade Virtual Box if everything is working, although it will probably ask you every time you boot the virtual machine.
DO NOT upgrade the linux system (or if you do, you may have to re-install the “Virtual Box tools” to use shared directories)
DO NOT upgrade the CODAS processing code. There could be significant reorganization or changes which would be painful to adapt to. Instead, if there is some reason to upgrade the CODAS processing code, (for example if you found a bug) then you could try, but you might need to replace your virtual computer with another one. The virtual computer is designed to be used and then after some point, replaced rather than manually updated.
At this point, you should be able to test your CODAS virtual computer using these instructions.
If you want to see all the effort you saved during installation, or learn more about the components that go into installing CODAS software, browse to the next page.
Otherwise, assuming everything works, you can skip the other installation pages and move on to processing.