2.3.4. VBox part 2: CODAS Virtual Computer Navigation
When booted, the virtual computer automatically logs in
user “adcpproc”
password “codas3”
computer is called “codaspy”
Networking is done by Virtual Box through the host computer, so if your computer is on the network, codaspy should also be on the network.
Warning
If you did not reset your MAC address when you imported the virtual machine,
DO IT NOW.
It is very bad for the network if two machines have the same MAC address.
shut down the Virtual Computer
- look for the
Devicesmenu choose
Networking- look for
Network Settings click
Advancedclick on a little green recycle icon near the MAC address.
- look for
- look for the
restart the Virtual Computer
Go ahead, don’t wait.
This is critical if you are on the same network as someone else running the same virtual computer
Screenshots of the steps are here.
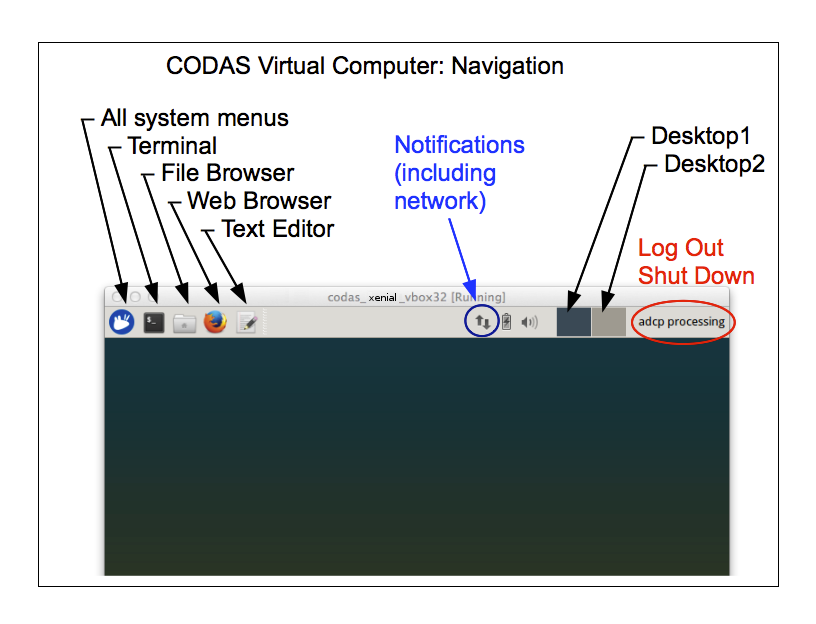
The images below give a quick look at the tools on the codaspy desktop. Click the images for a larger view.
General desktop layout
Your desktop color may different from these screenshots, but the layout should be the same. The new desktop is only shown where there are substantive differences.
Starting a Terminal window
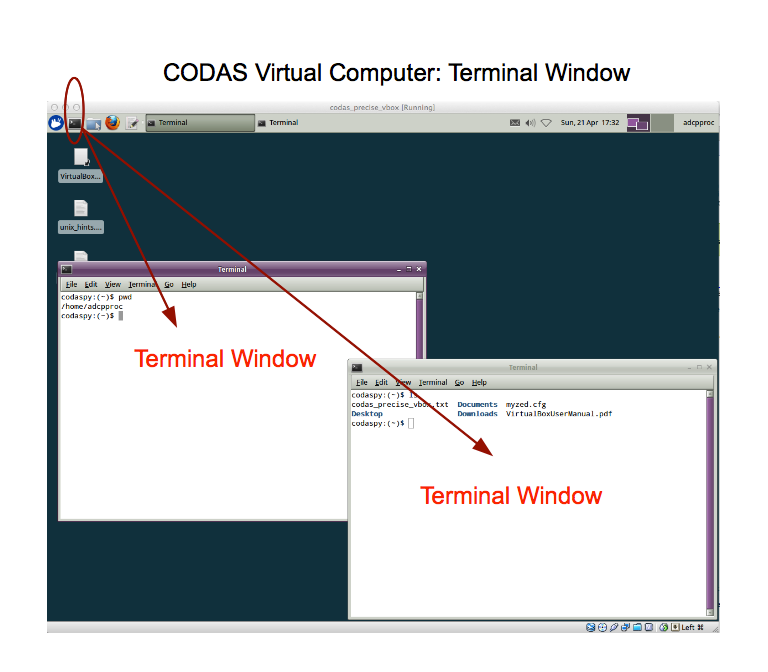
The Virtual computer has been set to share a clipboard with the host computer, so you should be able to copy and paste instructions back and forth.
It is HIGHLY BENEFICIAL to have a 3-button mouse for editing and copy/paste commands in the Linux environment.
Copy/paste within the virtual computer can be done with a 3-button mouse by
double click or click-and-select text with the left button
paste it by clicking the middle button once.
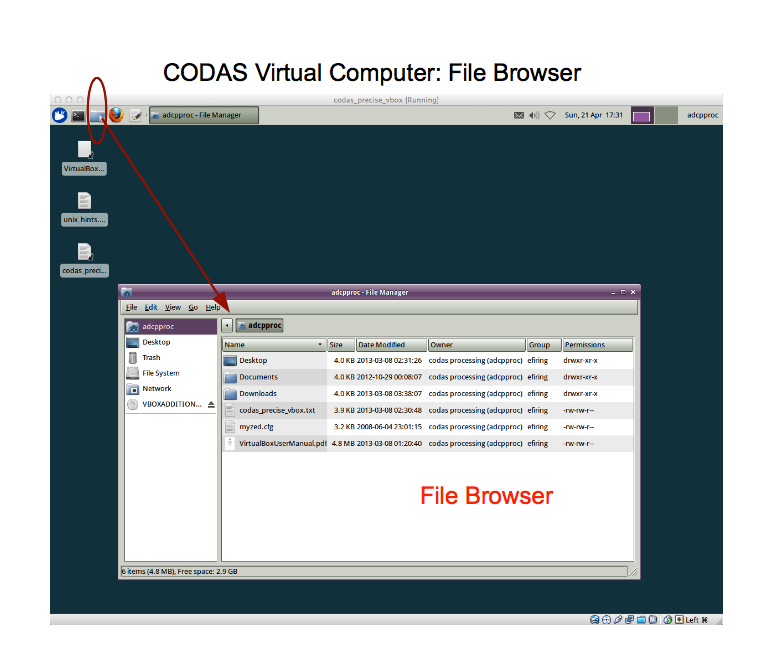
Starting a File Browser
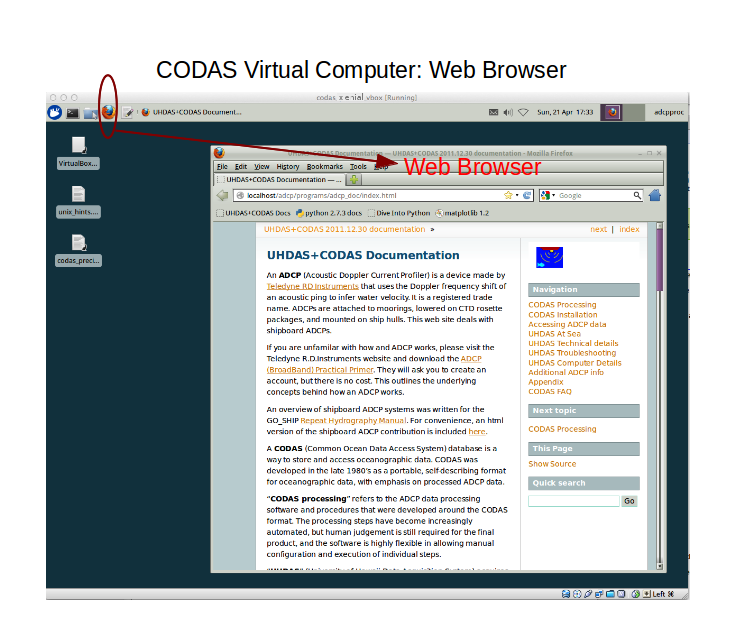
Starting a Web Browser
Starting a Text Editor: example using 2 text files provided
