2.4.4. ENR processing with adcp_database_maker.py
Note
Processing ENR data requires that ALL the original files of a logging series be present for the following suffixes:
ENR, N1R, N2R (if it exists), N3R (if exists)
It is also useful to have these for diagnostic purposes:
LTA (or STA), VMO, LOG
The preliminary processing tools were written to cope with VmDAS data collected with one file prefix, hence it is required that ascii sorting must be the same as time sorting.
The preliminary processing tools were written assuming all files from the VmDAS dataset are present.
Any deviations from these requirements may result in problems processing the data.
Note
Directory Strategy
To simplify the documentation, these instructions assume you have set up your directories as in Directory Setup and you are doing your processing demos in my_codas_demos/adcp_pyproc
your practice directory                 source
-----------------------                -----------

my_codas_demos
my_codas_demos/adcp_pyproc                 (new, WORKING IN HERE)
my_codas_demos/uhdas_data                  copy of codas_demos/uhdas_data
my_codas_demos/vmdas_data                  copy of codas_demos/vmdas_data
my_codas_demos/uhdas_style_data            (new, empty, for VmDAS conversion)
You should have already done the LTA adcp_database_maker.py processing.
This retrieves all kinds of useful information as well as giving you a
first look at the data. Even if you do not post-process the data, it
is extremely valuable to take that step.
The paradigm of adcp_database_maker.py is to keep ADCP processing
directories in the same place, for easier comparison.
Click the image of the adcp_database_maker.py overview to enlarge.
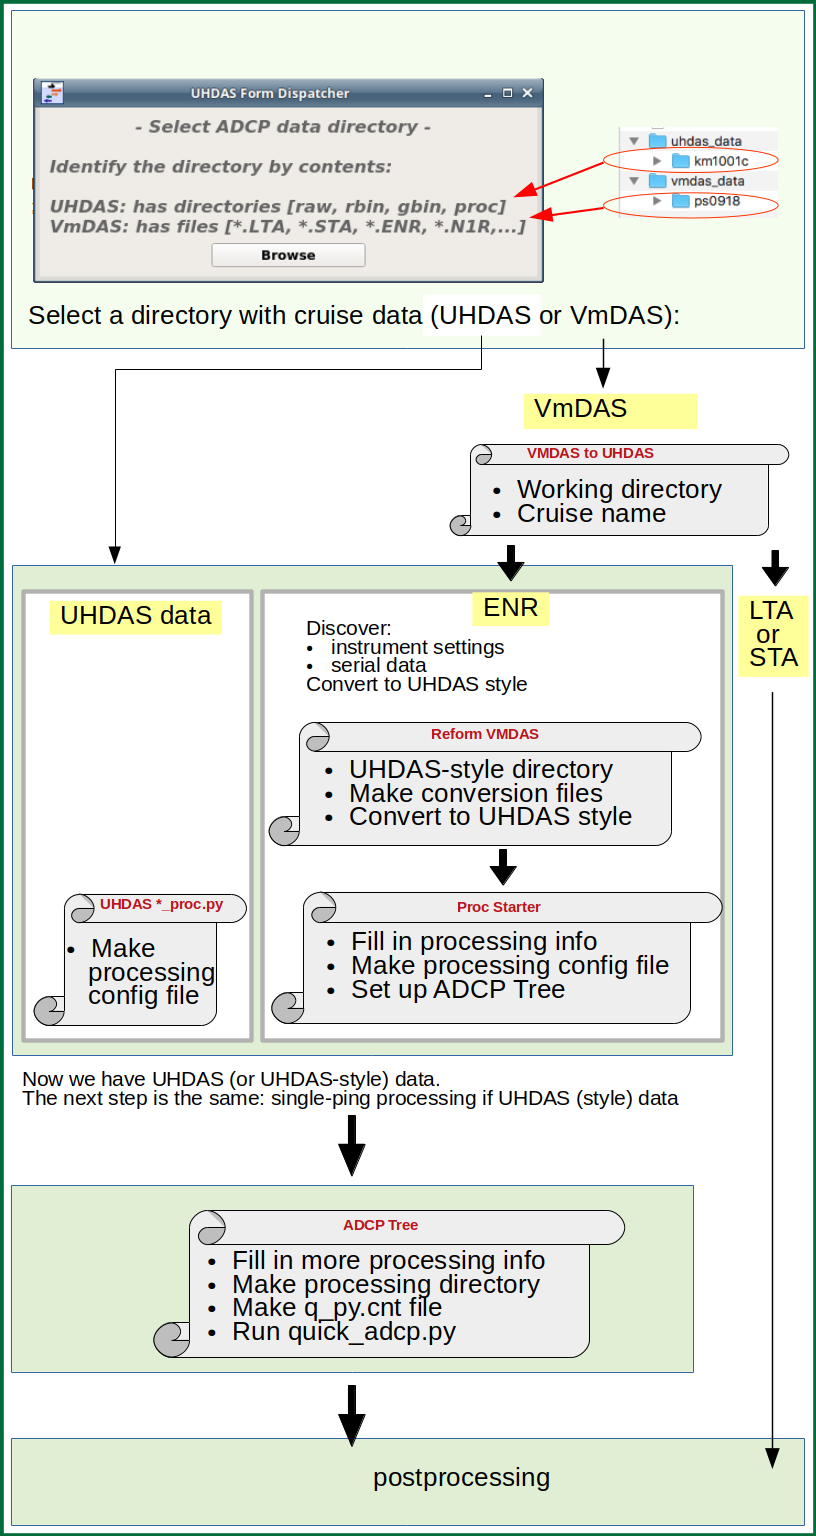
If you just did the LTA processing, just click on Convert *.ENR Files. Otherwise you have to pick the VmDAS data directory and put the cruise name in again.
Run adcp_database_maker.py from your adcp_pyproc directory (check the
adcp_database_maker.py overview
example:
cd ~/my_codas_demos/adcp_pyproc
adcp_database_maker.py
The adcp_database_maker.py window will pop up:
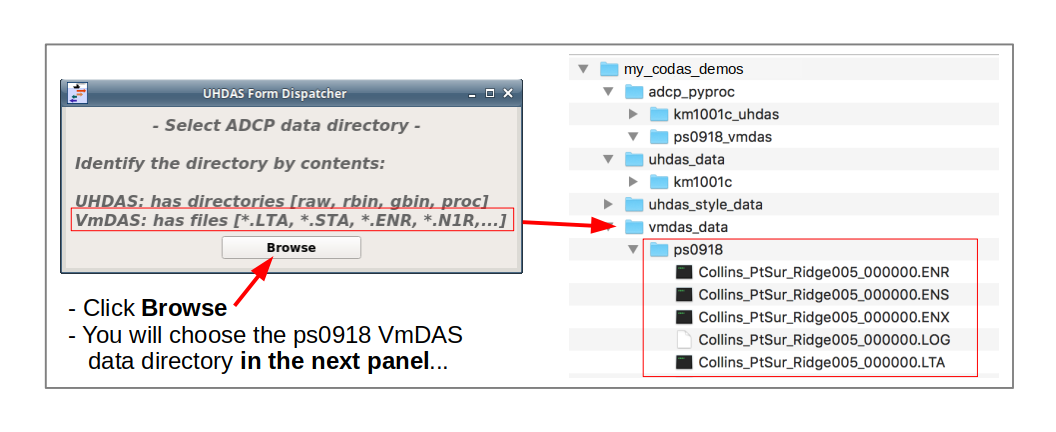
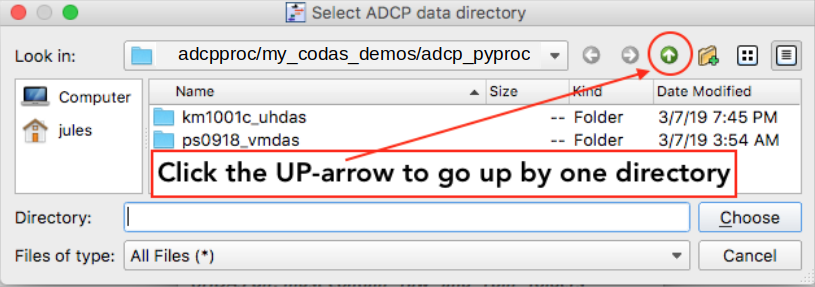
Navigate up one directory so you can choose the vmdas_data directory
Select the vmdas_data directory…

… and then choose ps0918
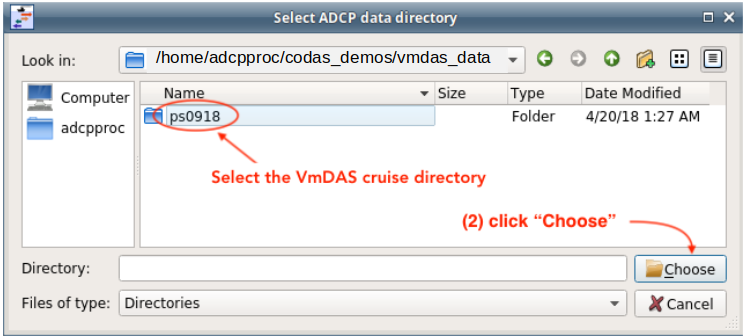
Choose a Project Directory (ps0918_vmdas) and a cruise name (ps0918) for titles and some filenames
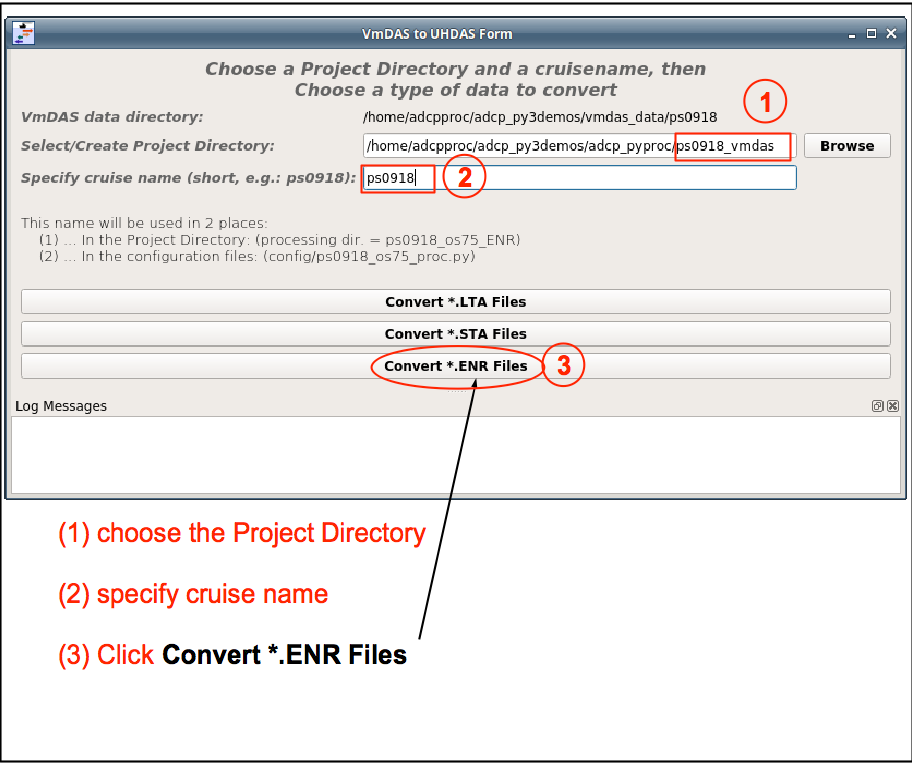
When you click the button to convert *.ENR files
the program will run vmdas_info.py
This will create a file with information discovered by this program.
You can also read the files created during the LTA processing
(Here is the manual way to get that information in the ENR single-ping processing demo, i.e. manually running commands)
Note
The next form discovers information about the vmdas data and converts the VmdAS data to UHDAS-style data. We need to identify the location where the uhdas-style data will go, and specify a cruise name.
Click Browse to select the location for the uhdas-style data.
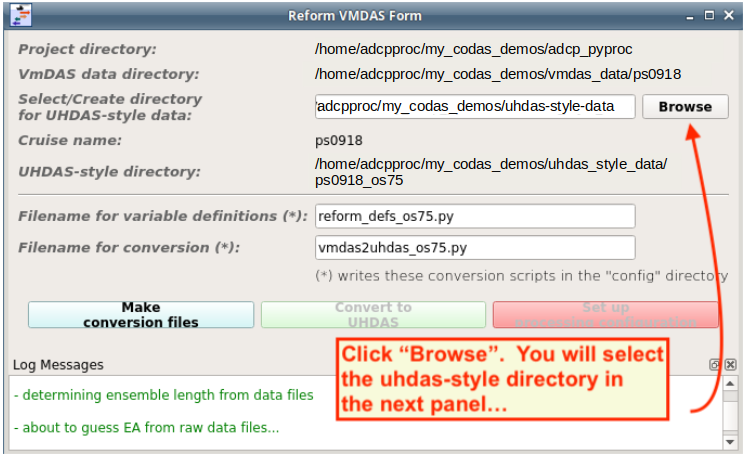
Instructions for selecting the uhdas-style data directory follow (2 steps)
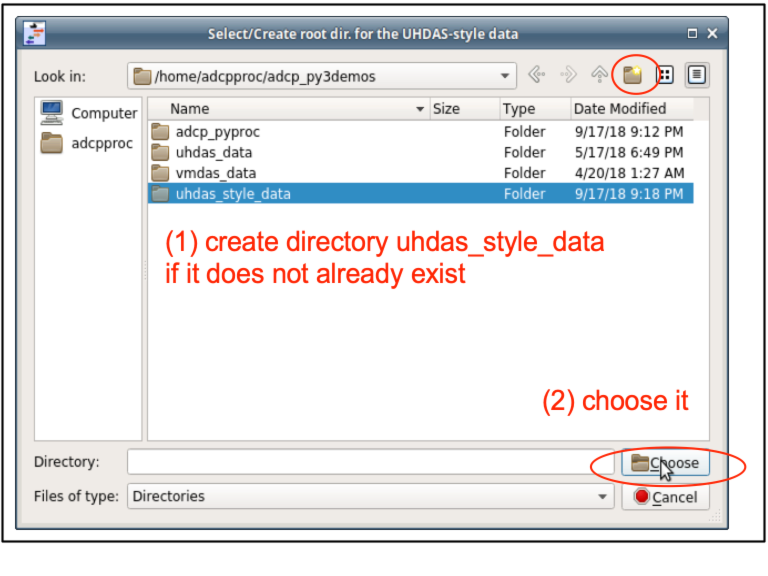
Navigate up one directory so you are looking at the directories with all the types of data:
Pick (or create) uhdas_style_data, a directory alongside the other data directories:
(1) Left Button: make the conversion files
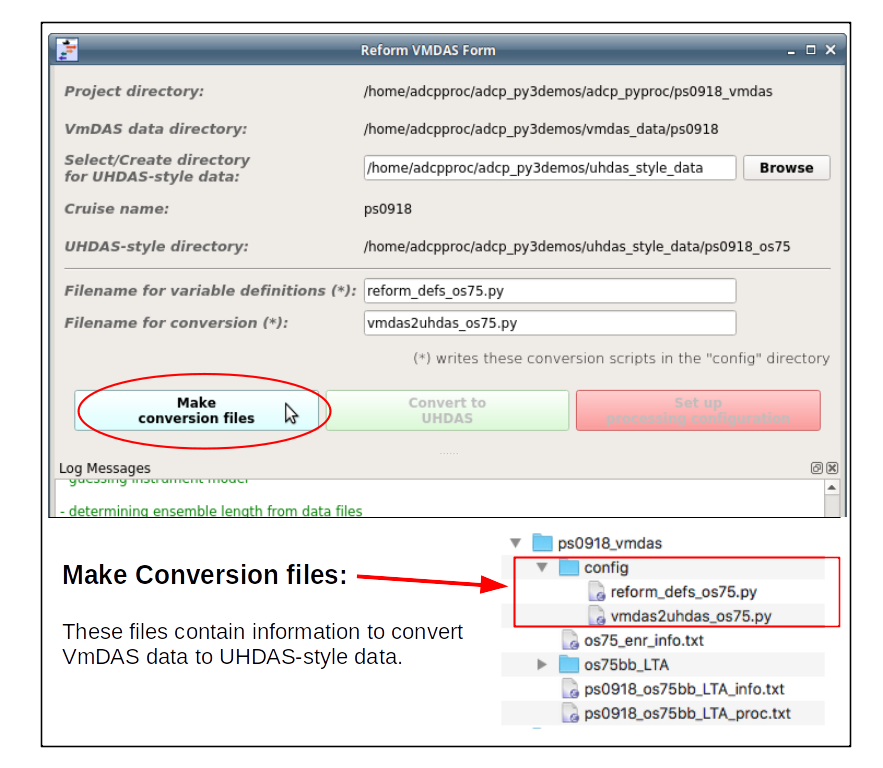
(Here is the manual way to make that
config directory and populate it with appropriate information)
(2) Middle Button: Convert the VmDAS data to UHDAS-style data.
This can be time-consuming if the cruise is over a week long.
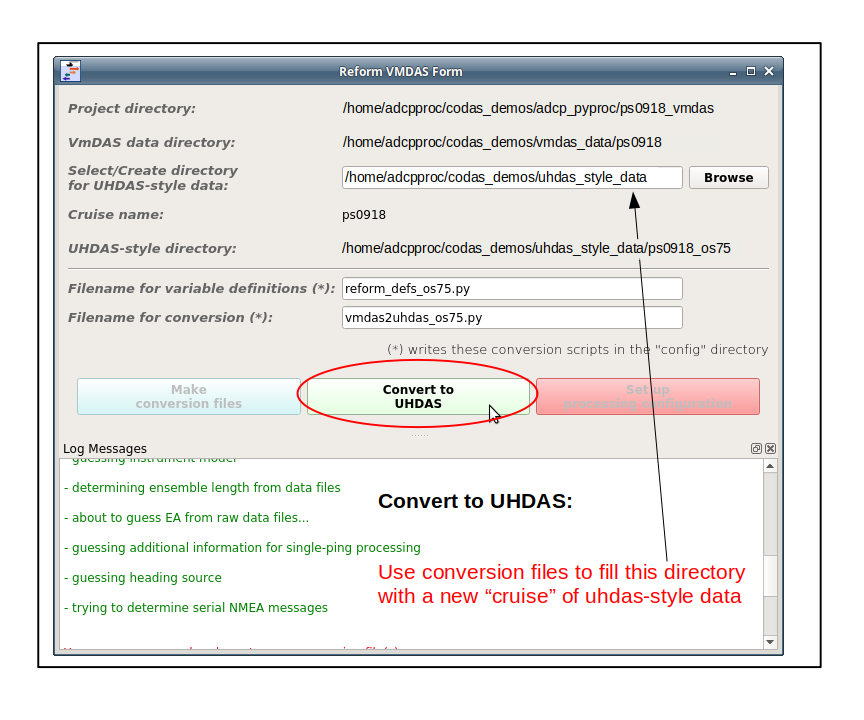
(Here is the manual way to convert Vmdas data to UHDAS-style data)
(3) Right Button: Set up Processing Configuration
This takes us to the form where we choose settings that are cruise-dependent (i.e. work for multiple sonars)
Next we use that information to convert (“reform”) the VmDAS data into UHDAS-style data. The GUI is described here.
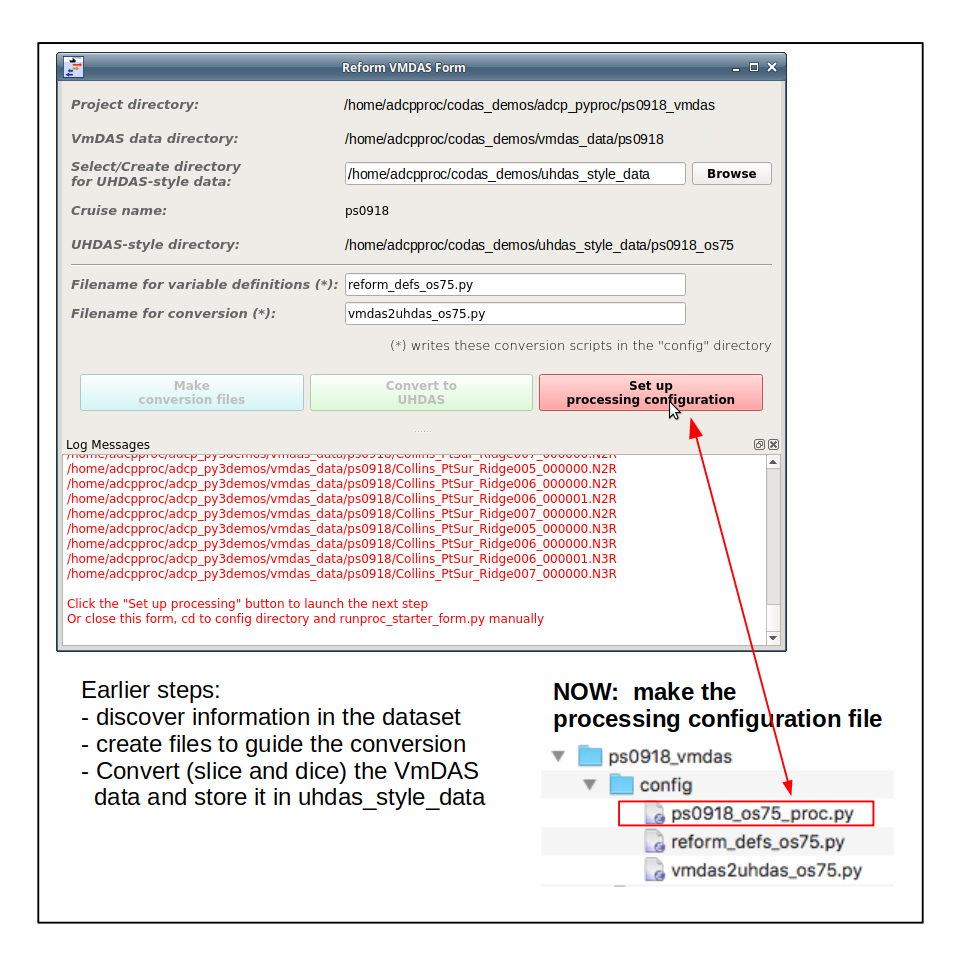
Note
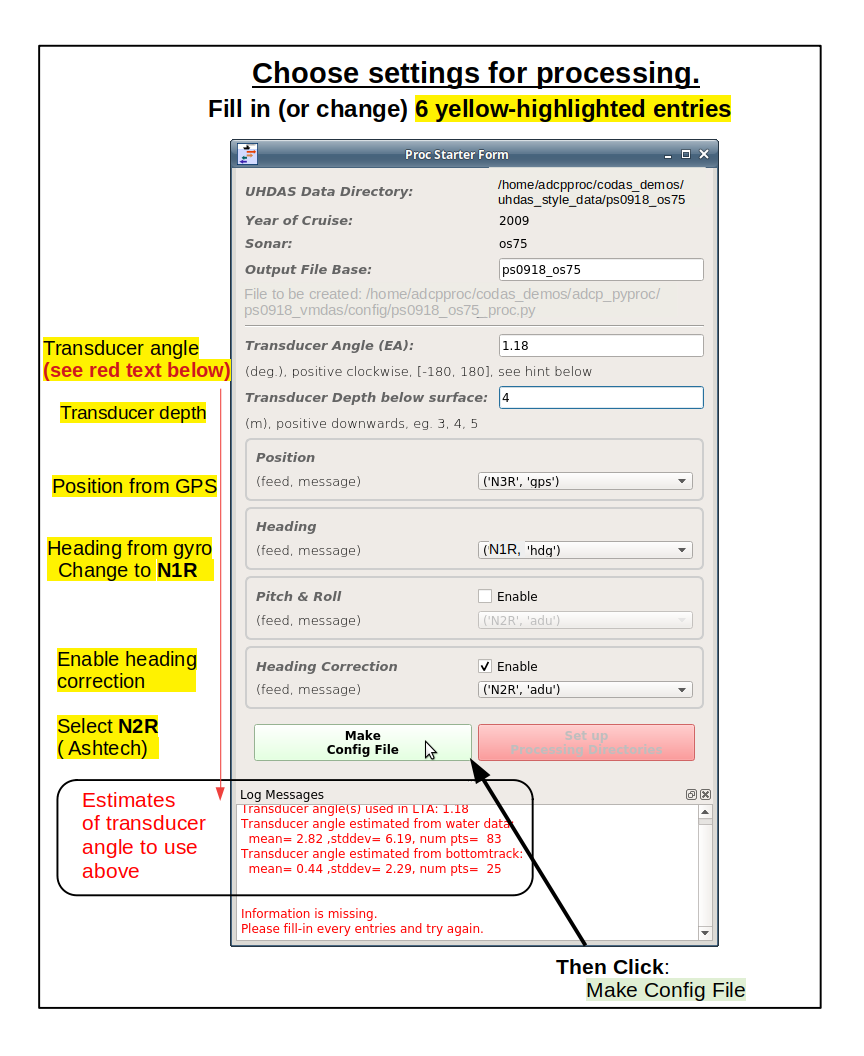
The next for sets up the processing configuration file.
The big difference in this GUI compared to older versions is that we can see the estimates for transducer angle at the bottom. Use that guidance to fill in the clockwise transducer angle.
(Here is the manual way to make that
config directory and populate it with appropriate information)
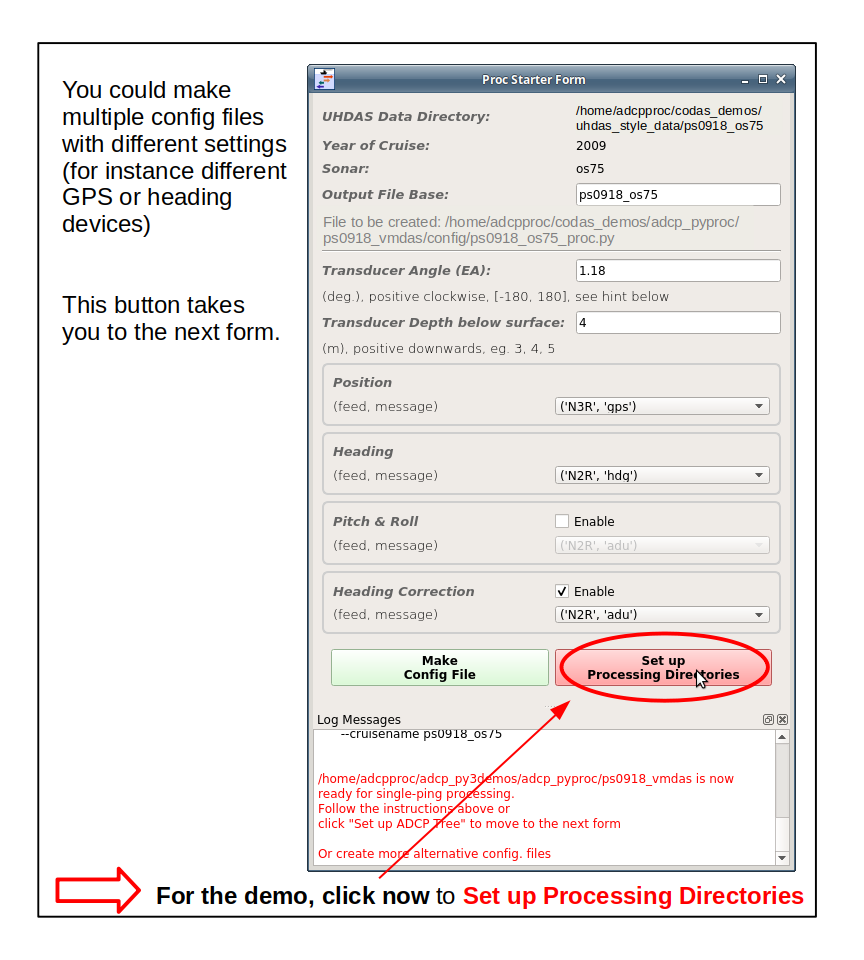
After you choose your settings, click the next button to
Set up Processing Directories. The design allows you to
save multiple *_proc.py config files before moving on
to do the processing.
Normally we would only make one here, and then go to the next form
Stage 3: Set up and run Single-ping processing
You can get the ADCP starboard and forward location relative to the position device, if you look at the xducer_dx and xducer_dy offsets from the LTA data.
The “Max depth for bottom search” refers to using a topographic dataset to estimate the depth. If the depth is shallower than this, DO try to find the bottom in the ADCP data and remove junk below the bottom.
Links to the same steps in example 4a are below:
Click Create Processing Dir (to create the processing directory with adcptree.py). This is fast.
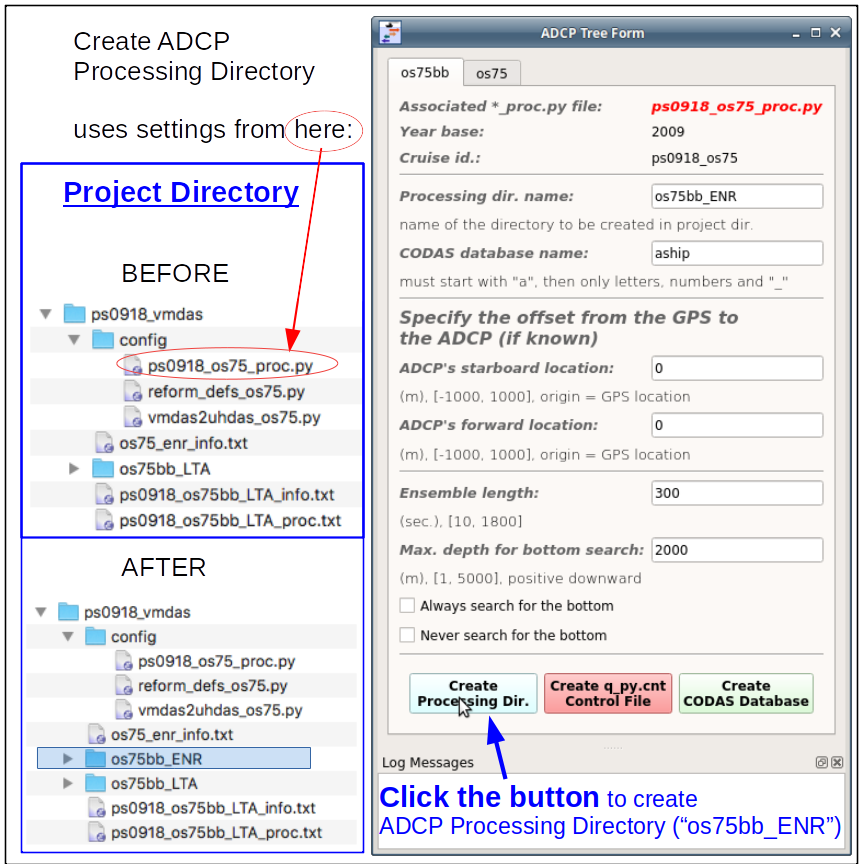
(Here is the manual way to make the CODAS Processing directory)
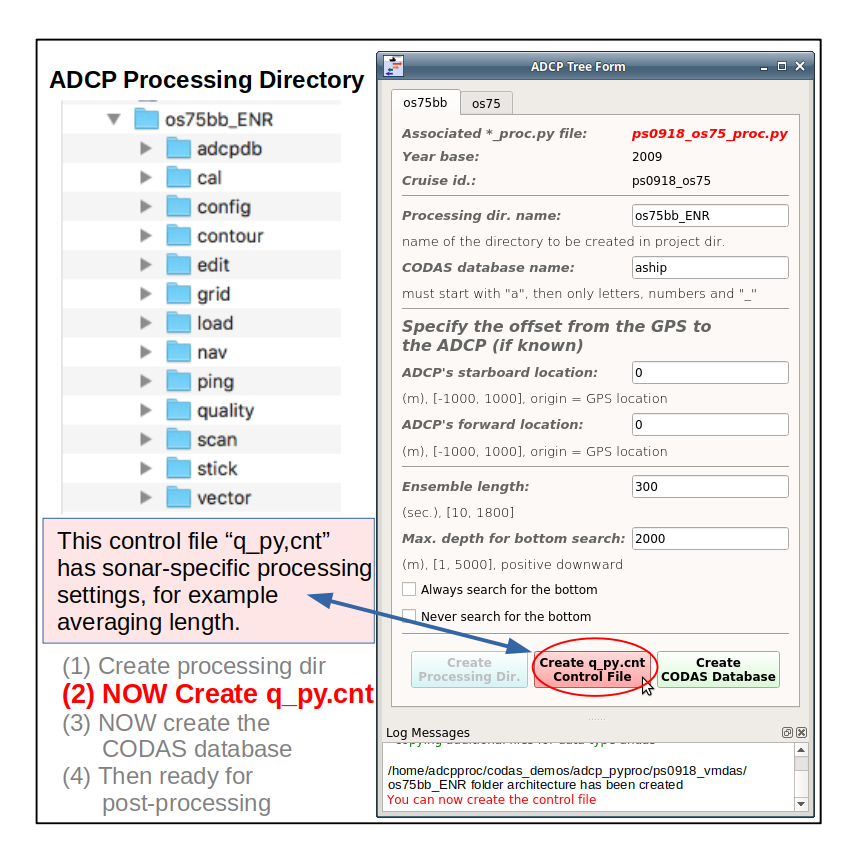
Click Create q_cnt control file (more processing commands). After you choose your settings (or use the defaults) this is also fast
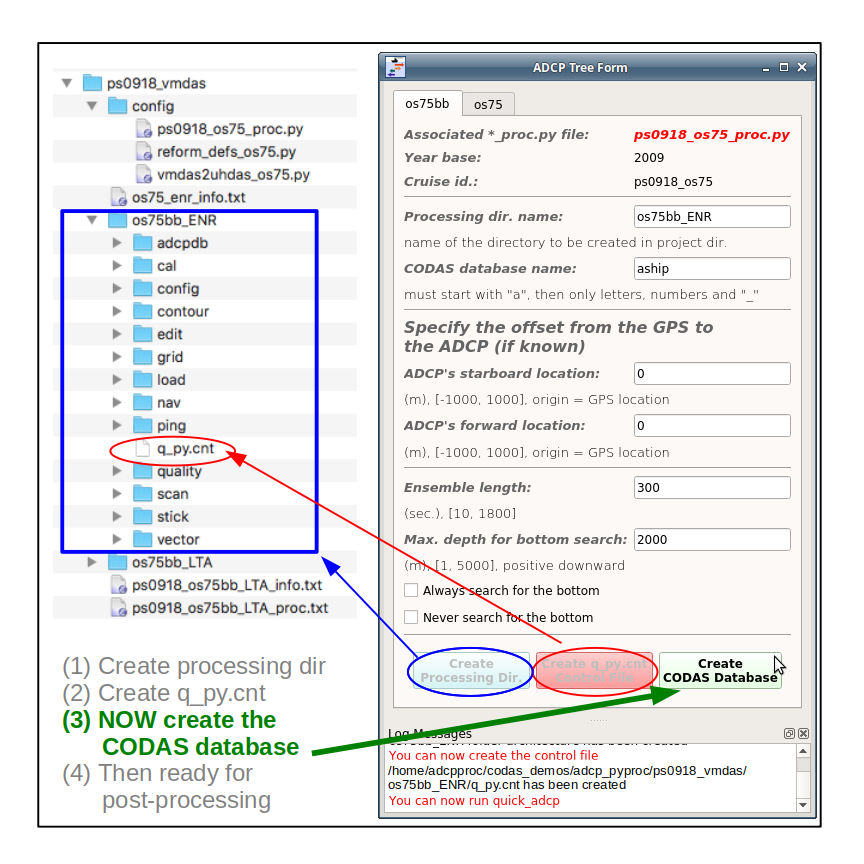
Click Create Codas Database (to create the CODAS averages). This takes longer than the earlier discovery stage, sometimes 15min.
You’ll know it is done when:
the spinning ball (or clock face) icon goes away
all the buttons are gray
the Log Messages window down below, both tell you to go run dataviewer.py
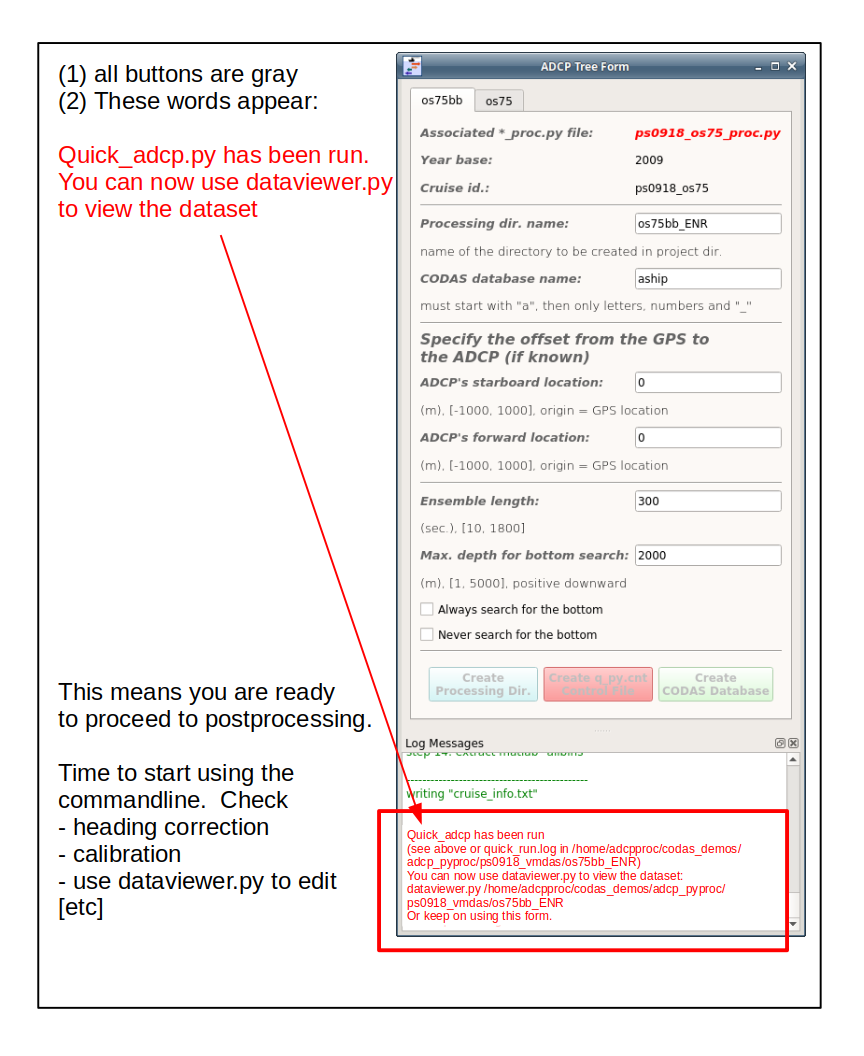
Now proceed with the post-processing steps. The next section shows the postprocessing steps for this VmDAS cruise. The UHDAS Post-processing Demo demo is another resource.
get into the command line terminal
check the figures
check the calibration
use dataviewer to look at (and edit) the data
use dataviewer.py -c to compare with the LTA data in the previous section
Available Demos
adcp_database_maker.py
commandline details